User Guide
Introduction
This user guide covers the SynchroniCity IoT Data Marketplace based on the Business API Ecosystem version 6.4.0, corresponding to FIWARE release 6. Any feedback on this document is highly welcomed, including bugs, typos or things you think should be included but aren’t. Please send them by creating an issue at GitHub Issues
This user guide contains a description of the different tasks that can be performed in the SynchroniCity IoT Data Marketplace using its web interface. This section is organized so that actions related to a particular user role are grouped together.
Profile Configuration
All the users of the system can configure their profile, so they can configure their personal information as well as their billing addresses and contact mediums.
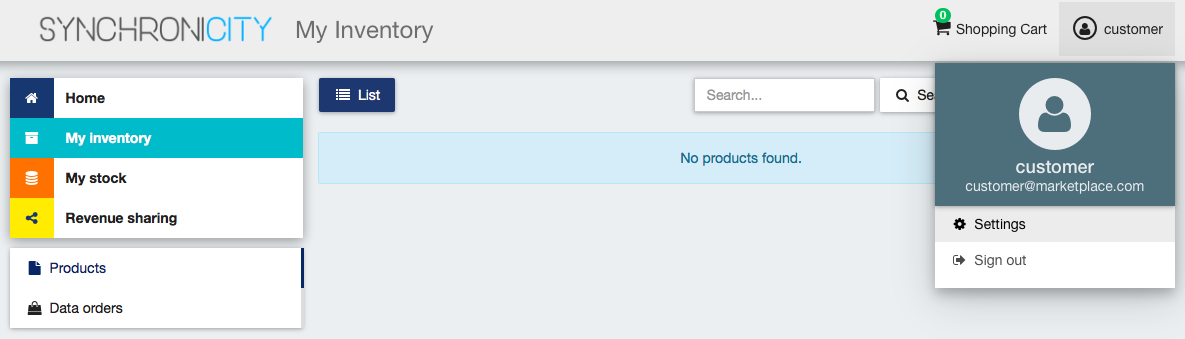
To configure the user profile, the first step is opening the user Settings located in the user menu.
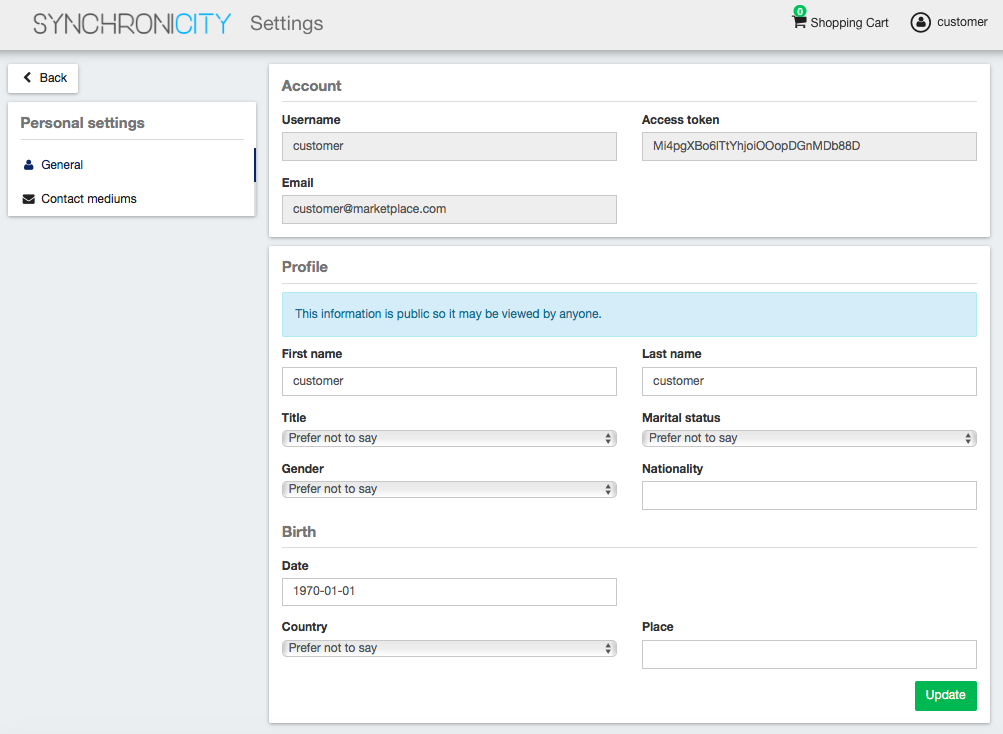
In the displayed view, it can be seen that some information related to the account is already included (Username, Email, Access token). This information is the one provided by the IdM after the login process.
The profile to be updated depends on whether the user is acting on behalf an organization or himself. In both cases, to update the profile, fill in the required information and click on Update.
For users, personal information is provided.
Note
Only the First name and Last name fields are mandatory
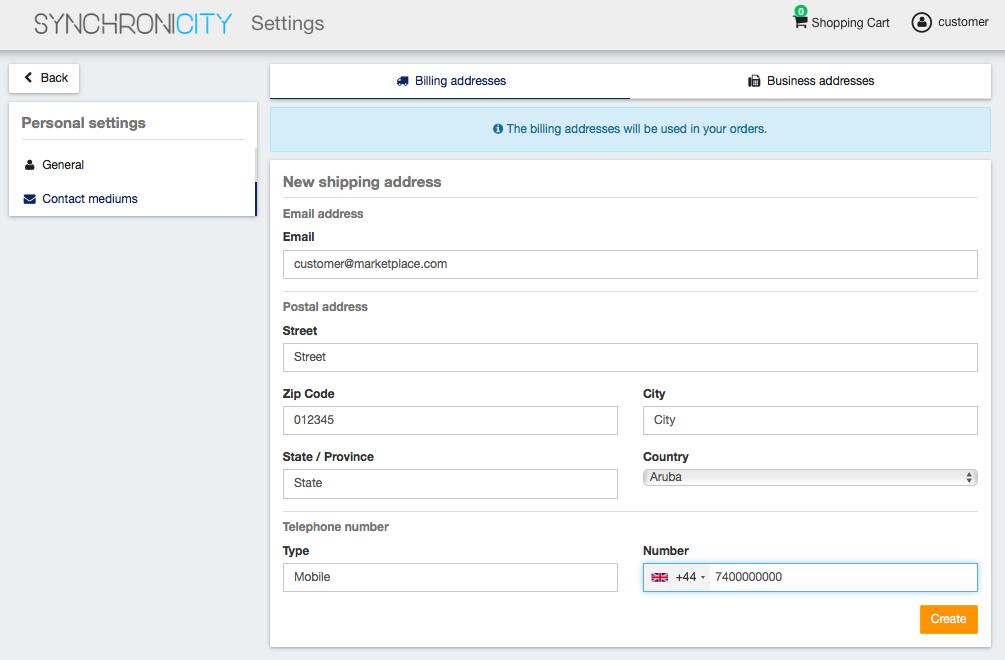
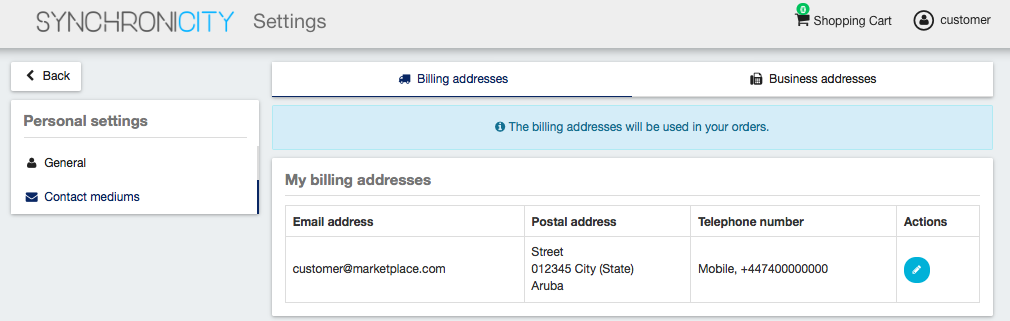
Once you have created your profile, you can include contact mediums by going to the Contact mediums section. In the Contact Medium section, there are two different tabs. On the one hand, the Billing addresses tab, where you can register the billing addresses you will be able to use when creating orders and purchasing data.
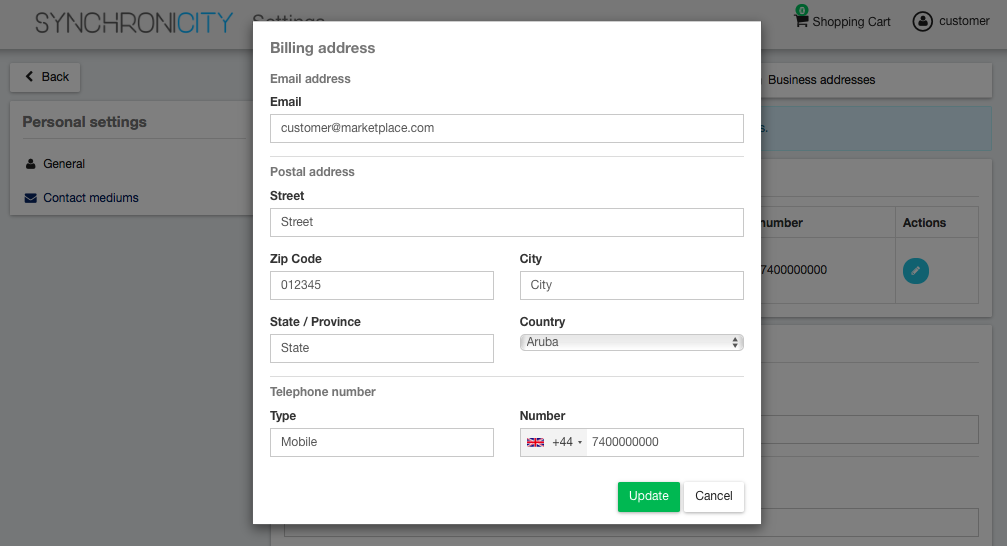
To create a blling address, fill in the fields and click on Create
Once created, you can edit the address by clicking on the Edit button of the specific address, and changing the wanted fields.
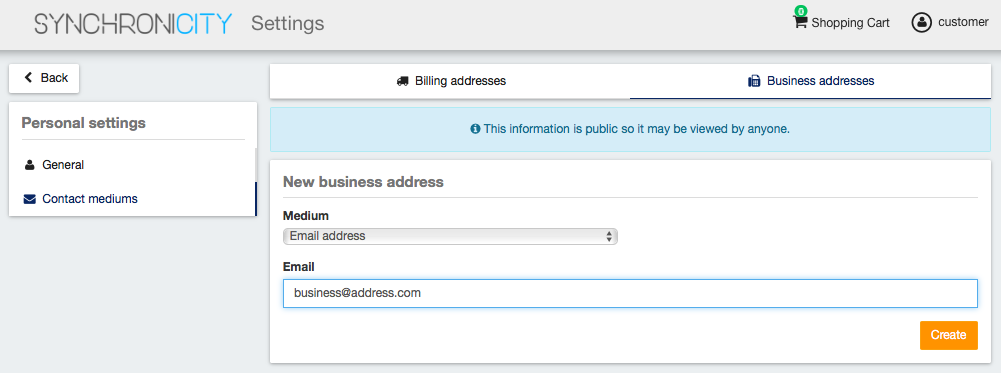
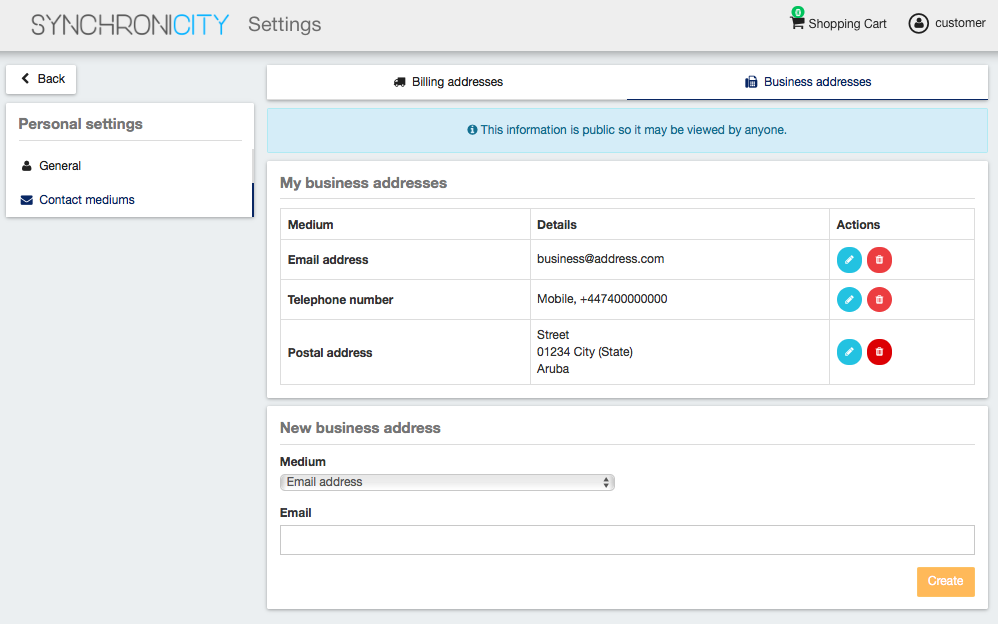
On the other hand, if you have the Seller role you can create Business Addresses, which can be used by your customers in order to allow them to contact you. In the Business Addresses tab you can create, different kind of contact mediums, including emails, phones, and addresses. To create a contact medium, fill in the fields and click on Create
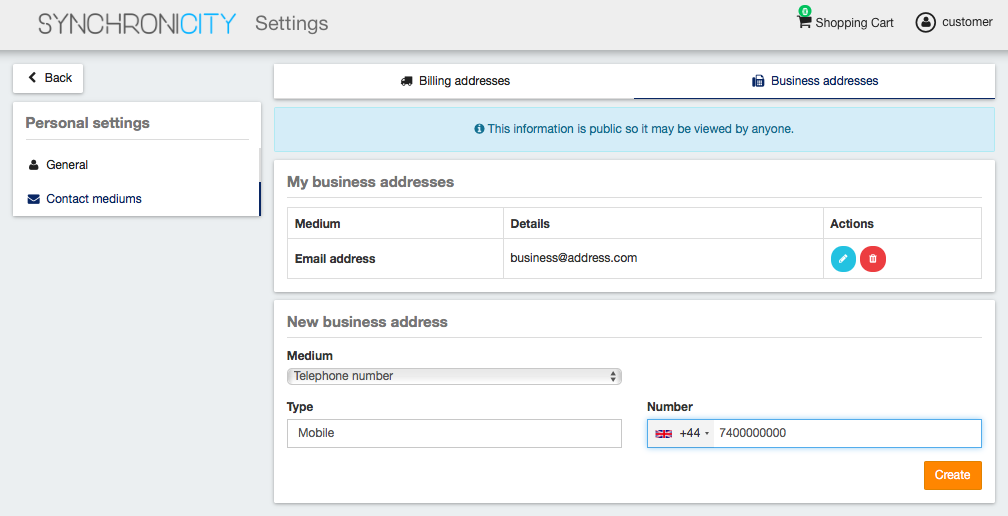
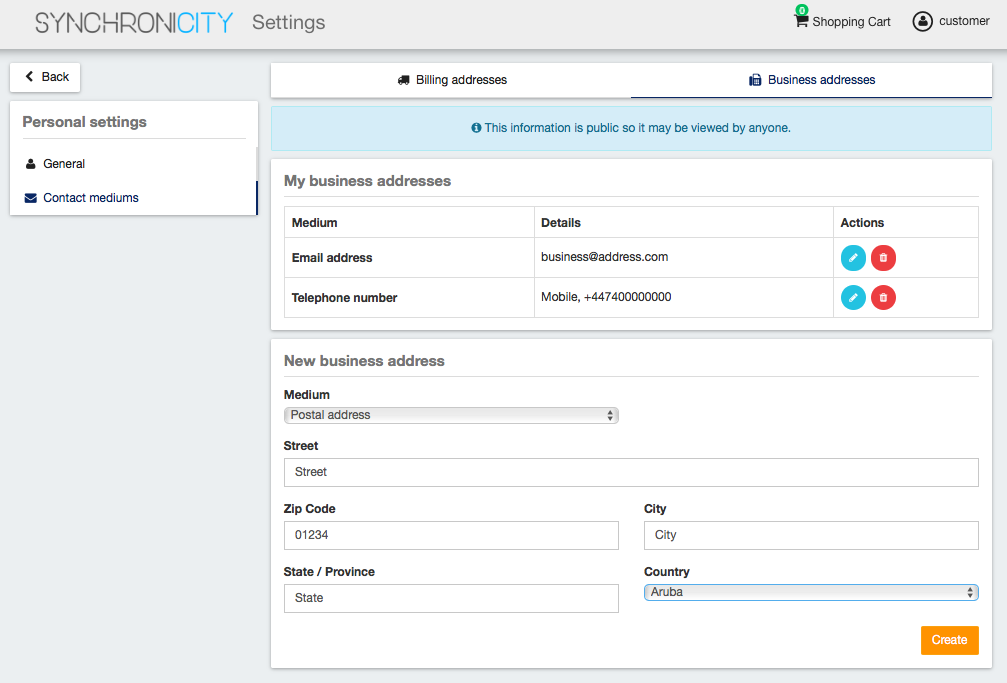
You can Edit or Remove the contact medium by clicking on the corresponding button
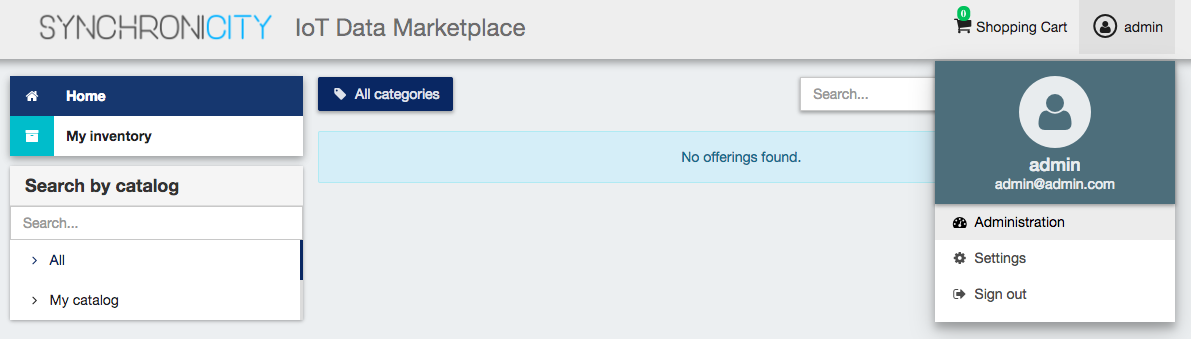
Admin
If the user of the SynchroniCity IoT Data Marketplace is an admin, he will be able to access the Administration section of the web portal. This section is located in the user menu.
Manage Categories
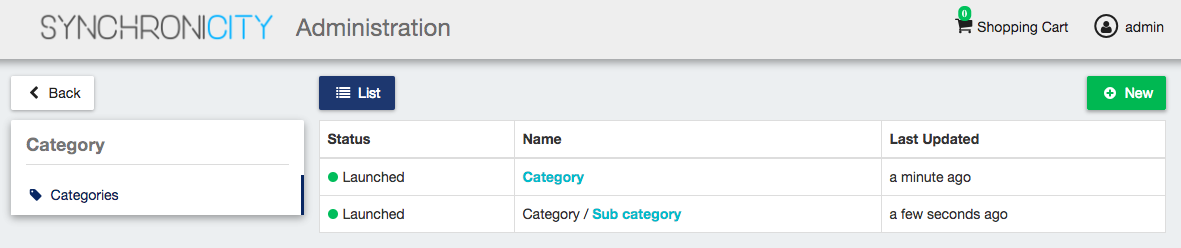
Admin users are authorized to create the system categories that can be used by Sellers to categorize their catalogs, data sources, and offerings.
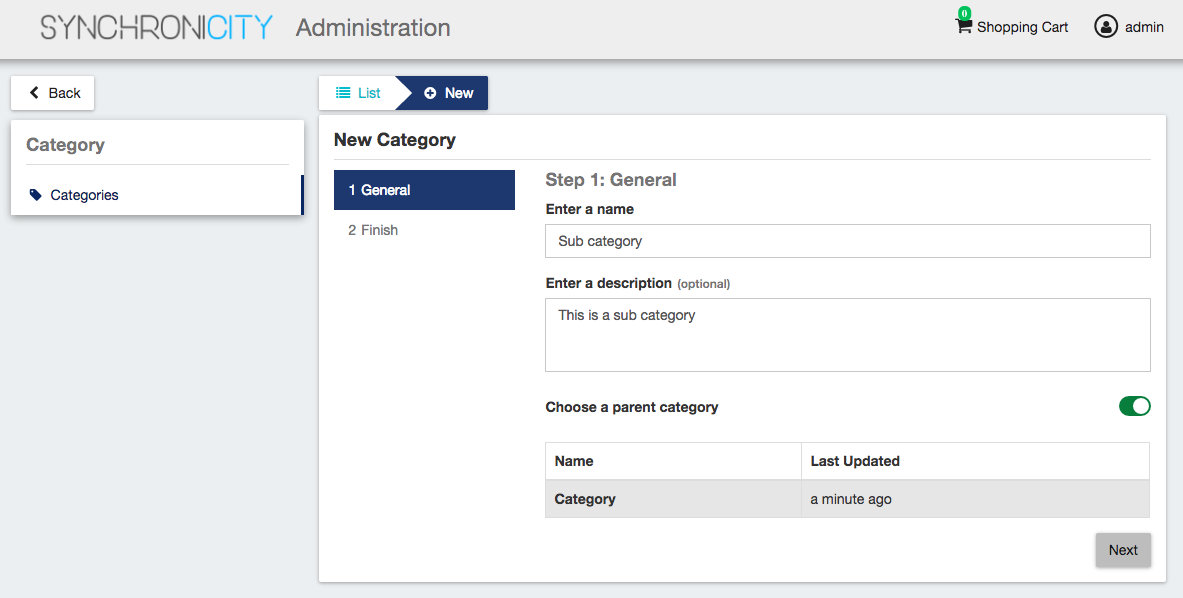
To create categories, go to the Administration section, and click on New

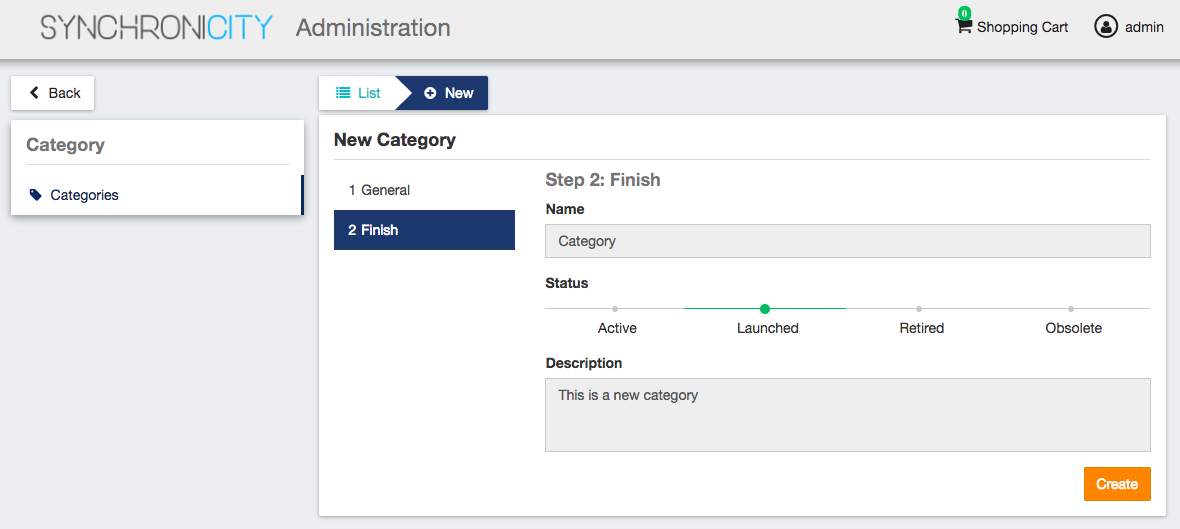
Then, provide a name and an optional description for the category. Once the information has been included, click on Next, and then on Create
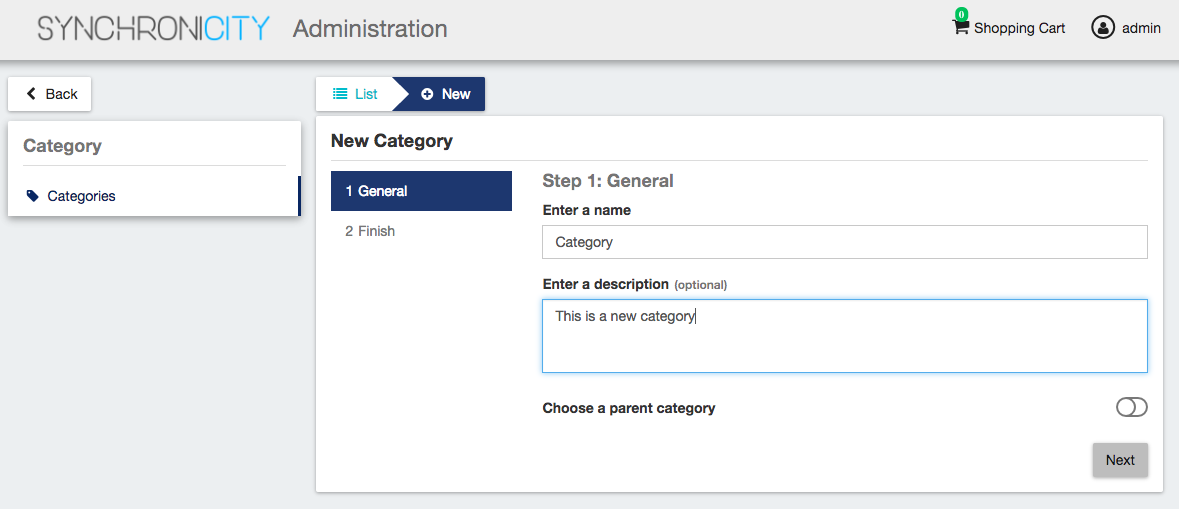
Categories in the SynchroniCity IoT Data Marketplace can be nested, so you can choose a parent category if you want while creating.
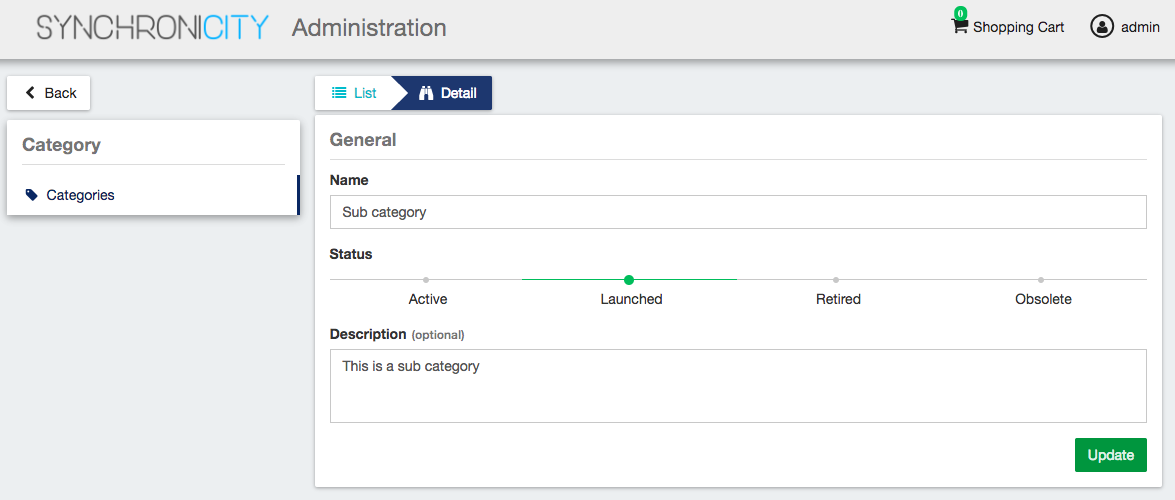
Existing categories can be updated. To edit a category click on the category name.
Then edit the corresponding fields and click on Update.
Seller
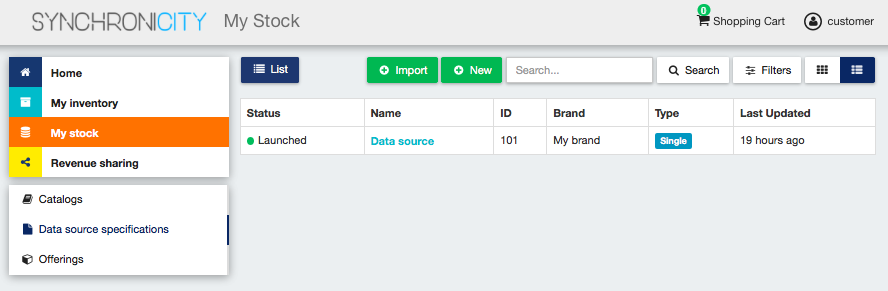
If the user of the SynchroniCity IoT Data Marketplace has the Seller role, he will be able to share and monetize his data sources by creating catalogs, data source specifications and offerings. All these objects are managed accessing My Stock section.
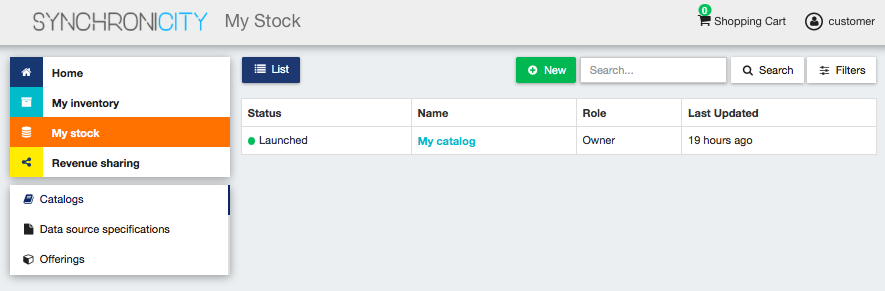
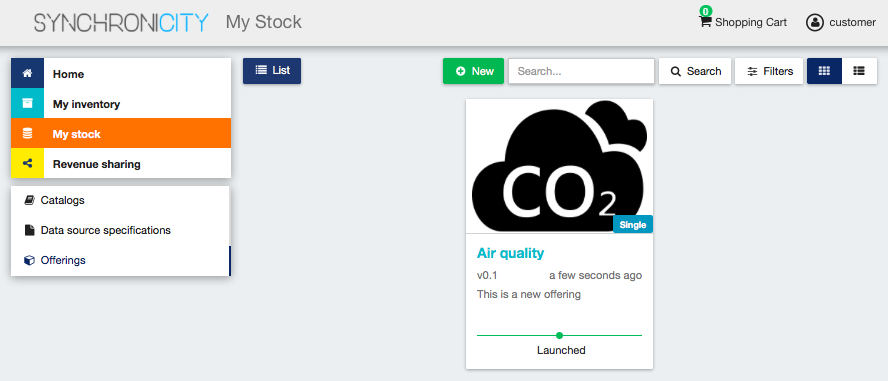
Manage Catalogs
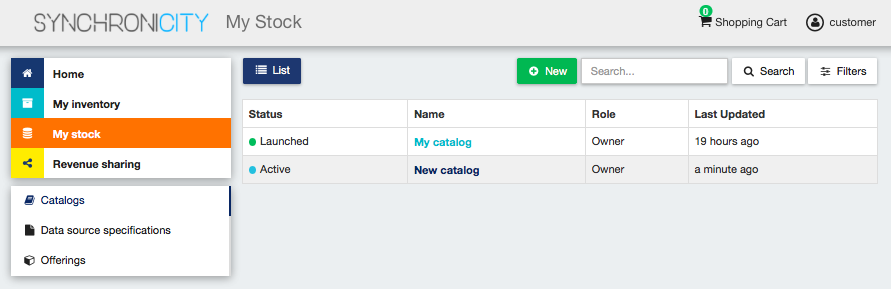
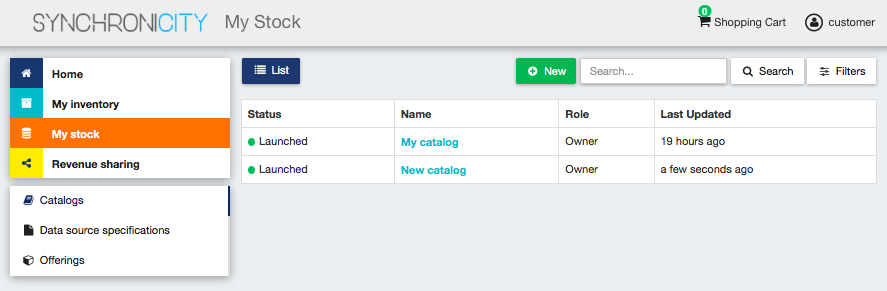
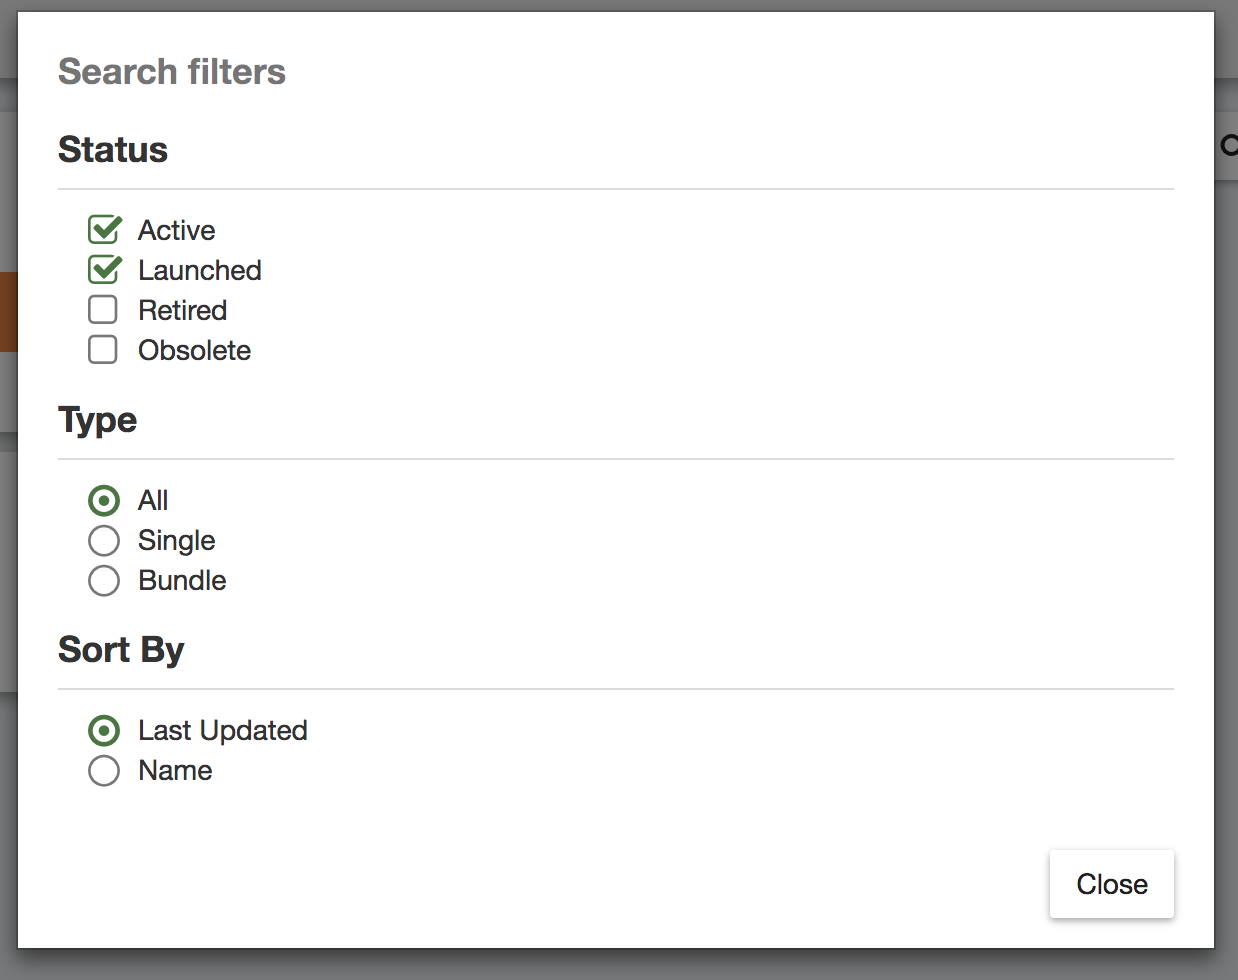
The Catalogs section is the one that is open by default when the seller accesses My Stock section. This section contains the catalogs the seller has created. Additionally, it has been defined several mechanisms for searching and filtering the list of catalogs displayed. On the one hand, it is possible to search catalogs by keyword using the search input provided in the menu bar. On the other hand, it is possible to specify how catalog list should be sorted or filter the shown catalogs by status and the role you are playing. To do that, click on Filters, choose the required parameters, and click on Close.

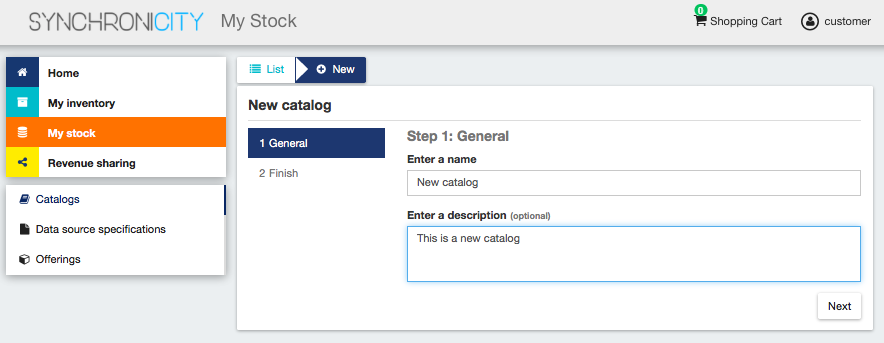
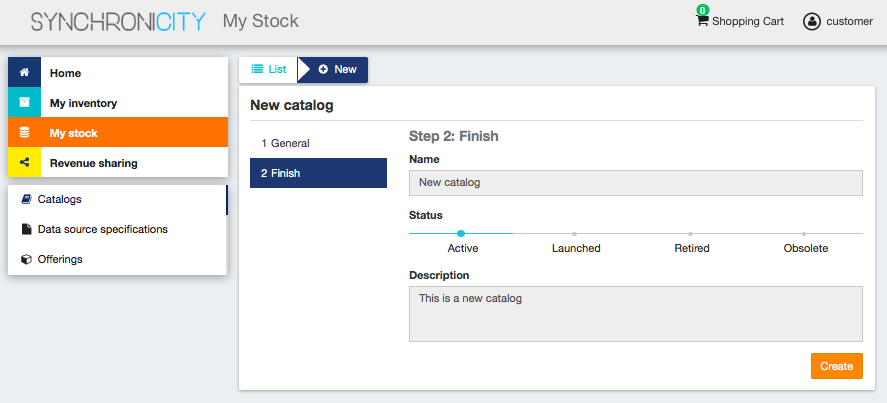
To create a new catalog click on the New button. Then, provide a name and an optional description for the catalog. Once you have filled the fields, click on Next, and then on Create
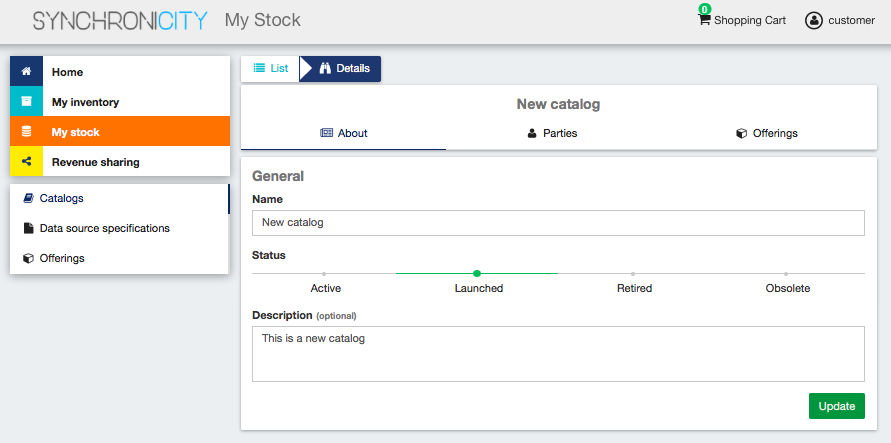
Sellers can also update their catalogs. To do that, click on the name of the catalog to open the update view.
Then, update the fields you want to modify and click on Update. In this view, it is possible to change the Status of the catalog. To start monetizing the catalog, and make it appear in the Home you have to change its status to Launched
Manage Data Source Specifications
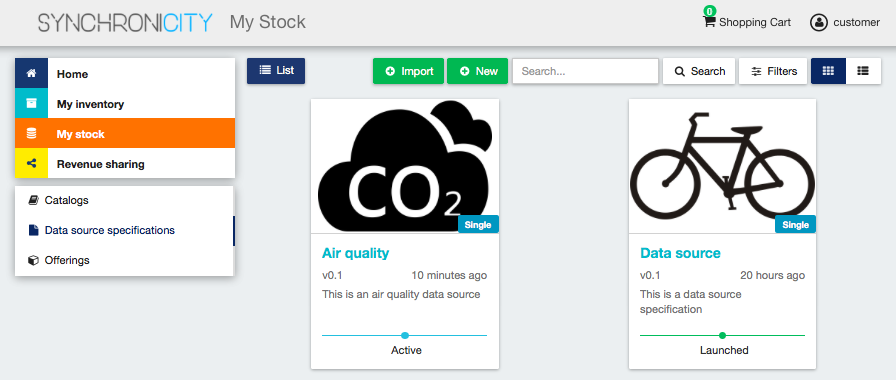
Data Source Specifications represent the data source being offered. To list your data source specifications go to My Stock section and click on Data source specifications.
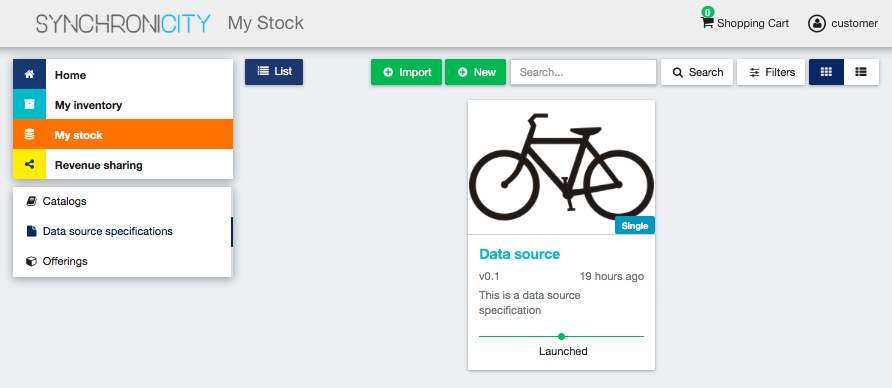
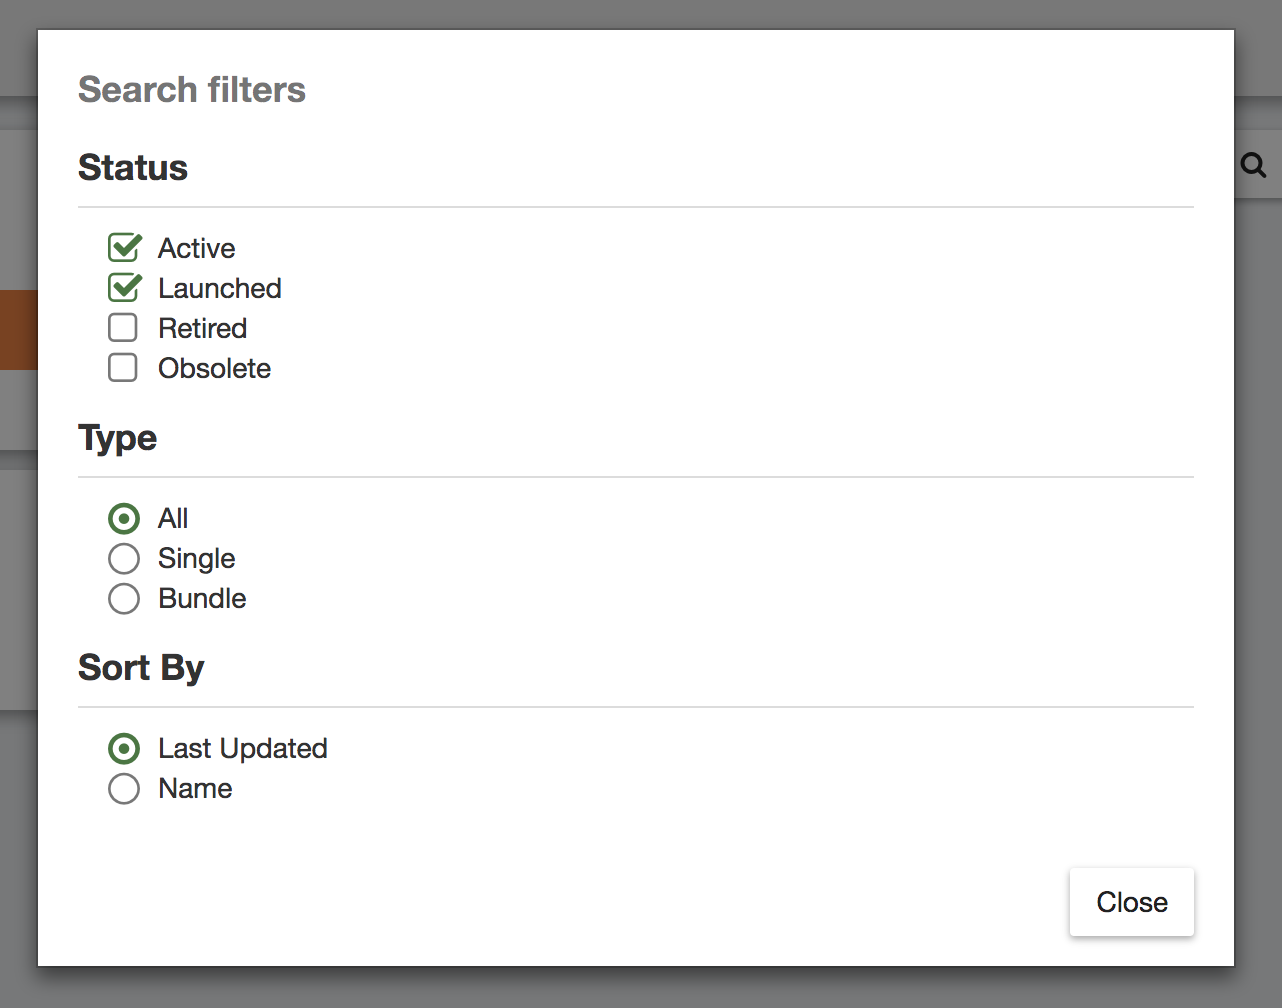
In the same way as catalogs, data source specifications can be searched by keyword, sorted, or filtered by status and whether they are bundles or not. To filter or sort data source specifications, click on Filters, choose the appropriate properties, and click on Close
Additionally, it is possible to switch between the grid view and the tabular view using the provided buttons.
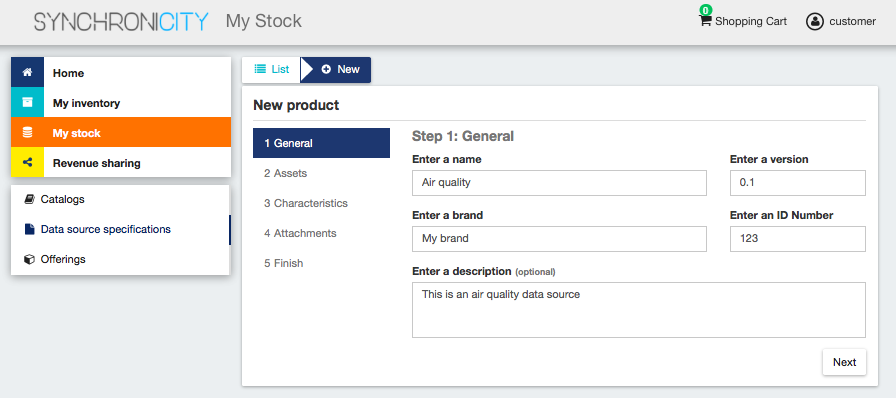
To create a new data source specification click on New. In the displayed view, provide the general information of the data source spec. including its name, version, and an optional description. In addition, you have to include the data source brand (Your brand), and an ID number which identifies the data source in your environment. Then, click on Next.
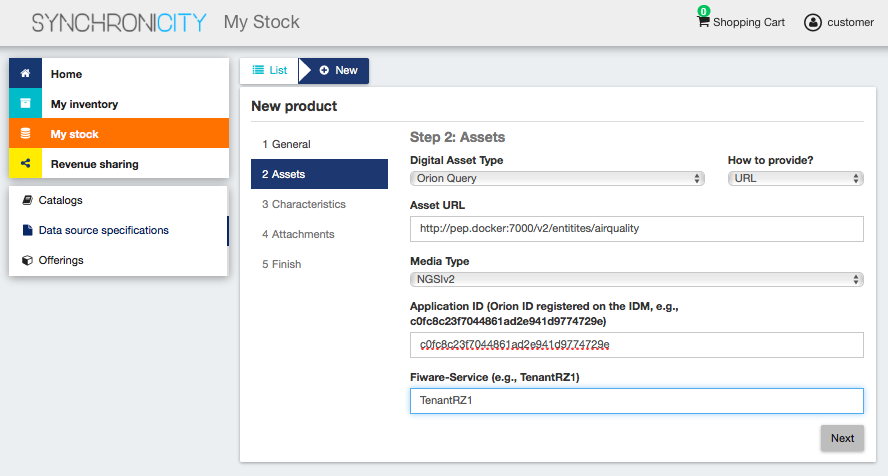
In the next step you you will be required to provide the asset.
For providing the asset, you have to choose between the available asset types, choose how to provide the asset between the available options, provide the asset, and include all the required information.
Note
Application ID has to be the same application ID of the Orion Context Broker instance registered on the IdM where your data source belongs. Fiware-Service is the header used to register your data source as an entity on the Orion Context Broker. If your user does not have a provider role for that specific Fiware-Service (e.g., TenantRZ1:provider) you will not be allowed to publish data source specification for that entity.
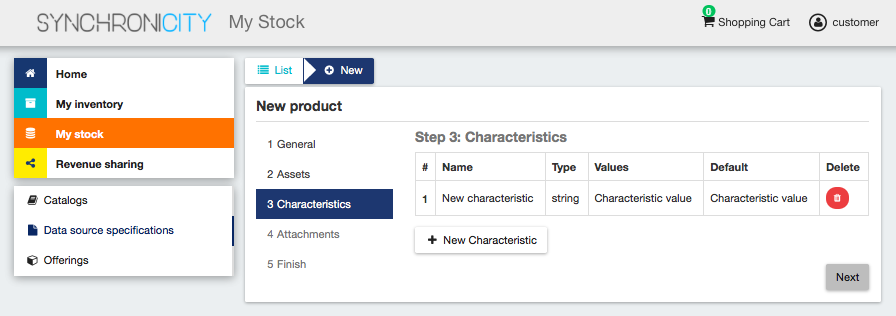
The next step in the creation of a data source spec. is including its characteristics. For including a new characteristic click on New Characteristic
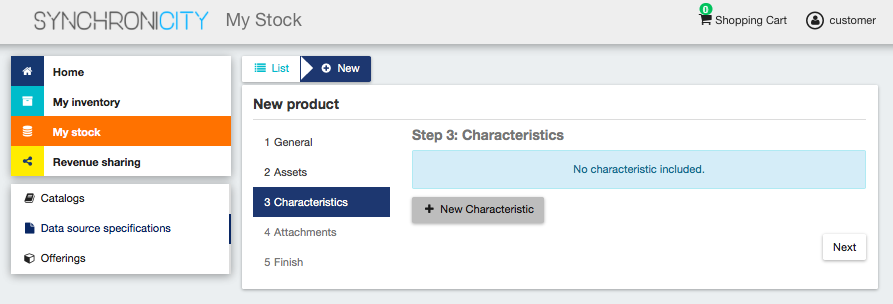
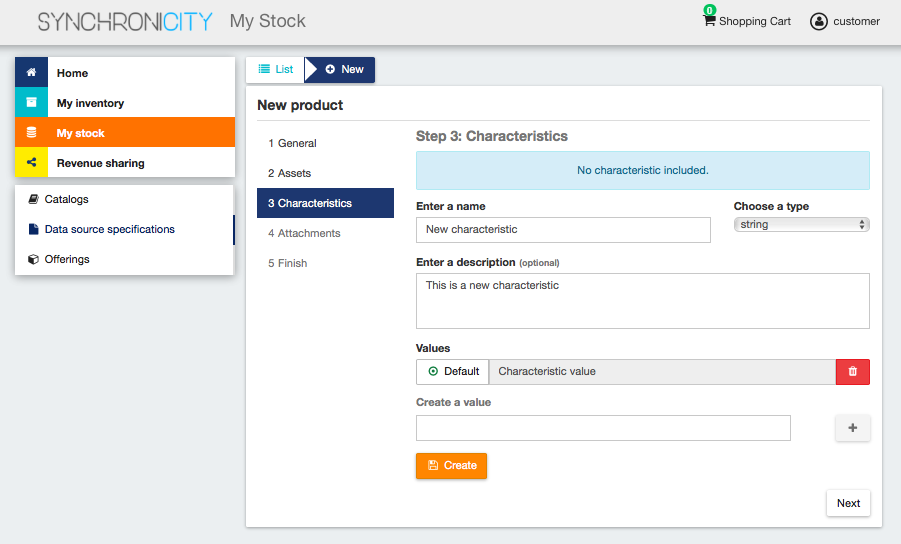
In the form, include the name, the type (string or number) and an optional description. Then create the values of the characteristic by filling the Create a value input and clicking on +.
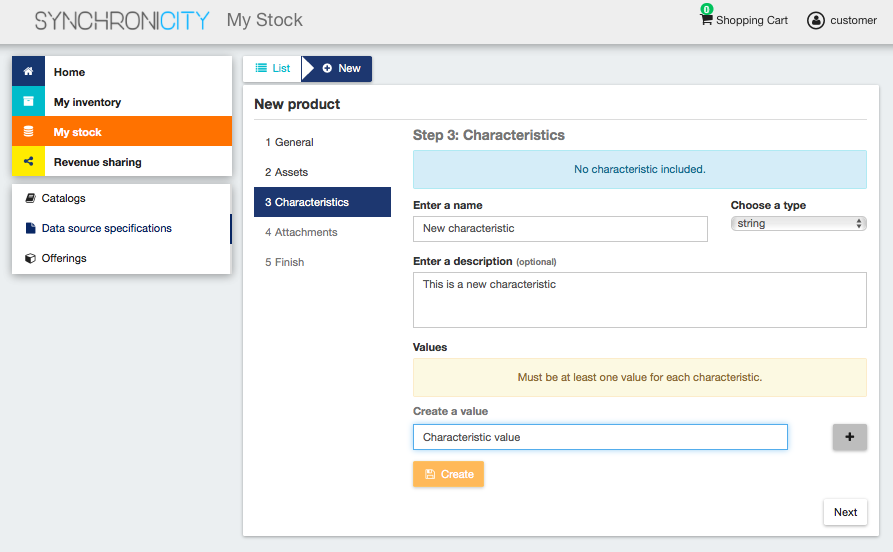
Once you have included all the characteristic info, save it clicking on Create
Once you have included all the required characteristics click on Next
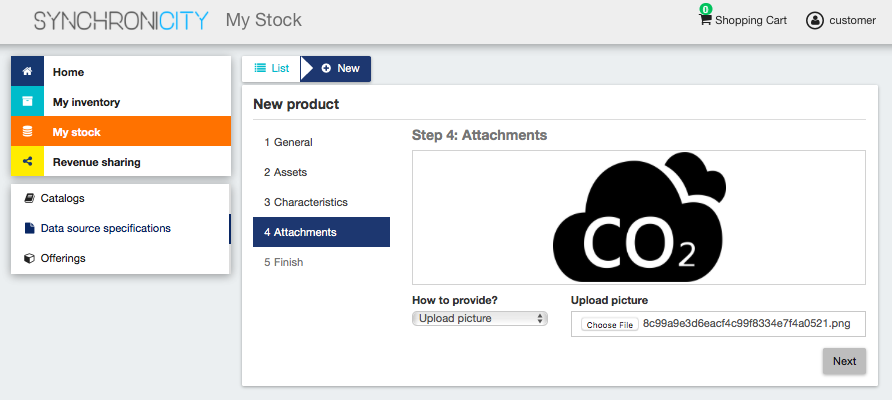
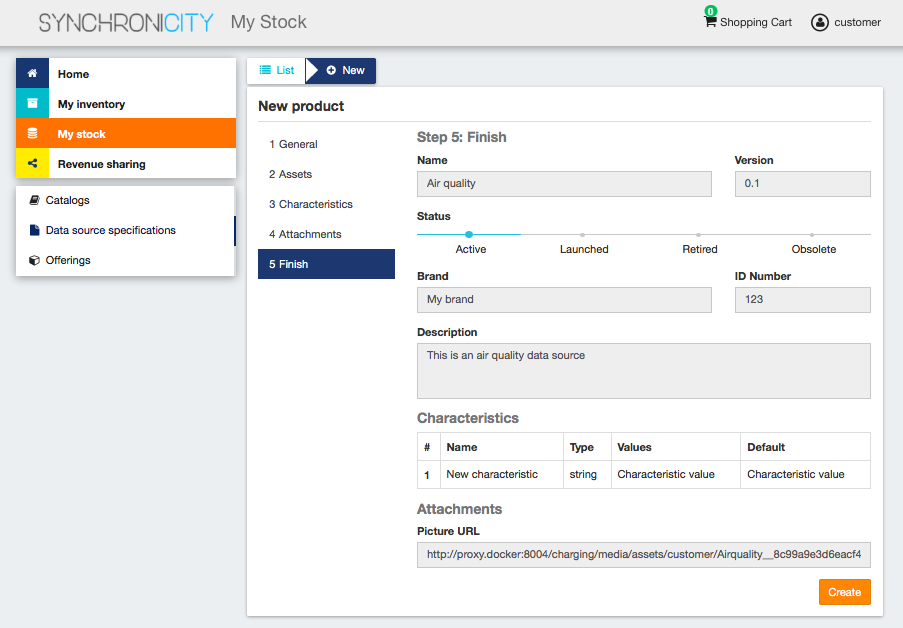
In the next step you can include a picture for your data source spec. You have two options, providing an URL pointing to the picture or directly uploading it. Once provided click Next (Image credit for this example: oNline Web Fonts )
Once done click on Next and then on Create
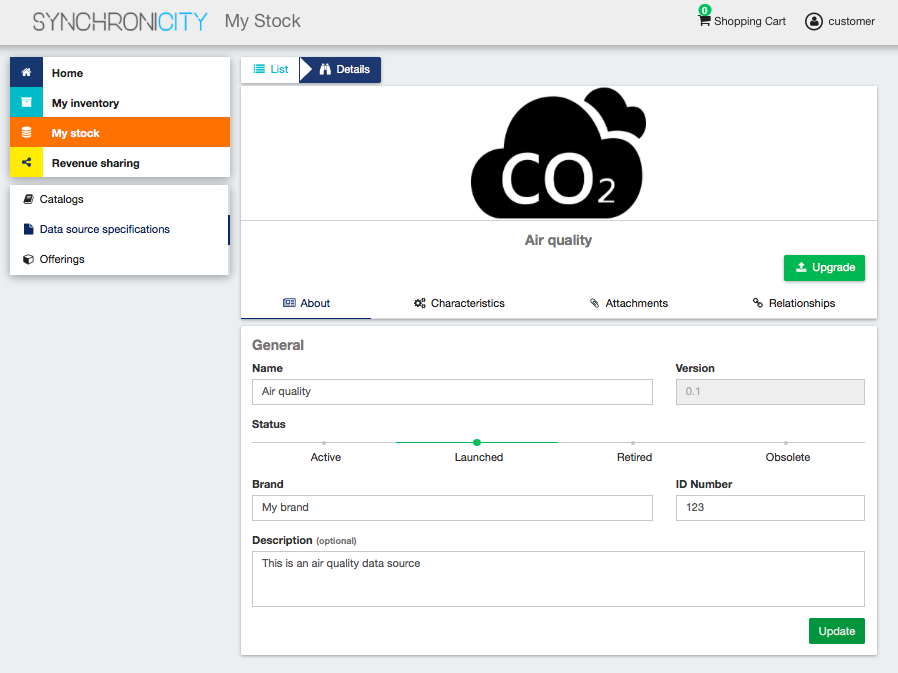
Sellers can update their data source. To do that click on the data source specification to be updated.
Update the required values and click on Update. Note that for start selling an offering that includes the data source specification you will be required to change its status to Launched

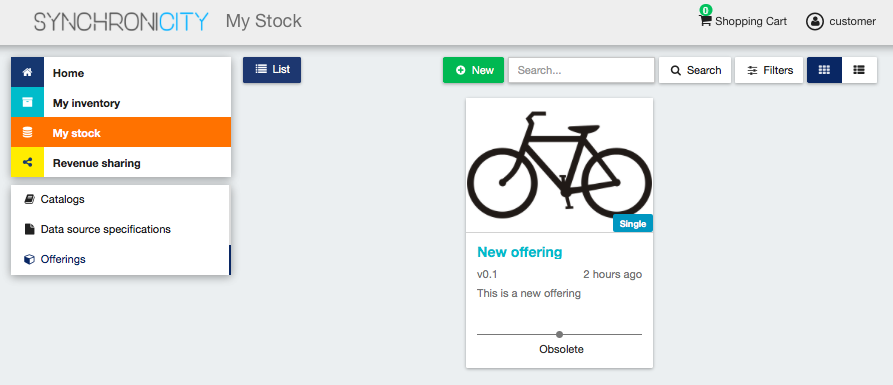
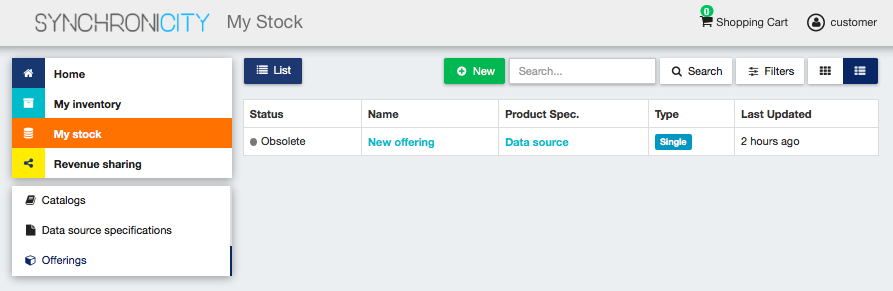
Manage Data Offerings
Data Offerings are the entities that contain the license, pricing models and revenue sharing info used to monetize a data source specification. To list your data offerings, go to My Stock section and click on Offerings
The existing data source offerings can be searched by keyword, sorted, or filtered by status and whether they are bundles or not. To filter or sort data offerings, click on Filters, choose the appropriate properties, and click on Close
Additionally, it is possible to switch between the grid view and the tabular view by clicking on the specific button.
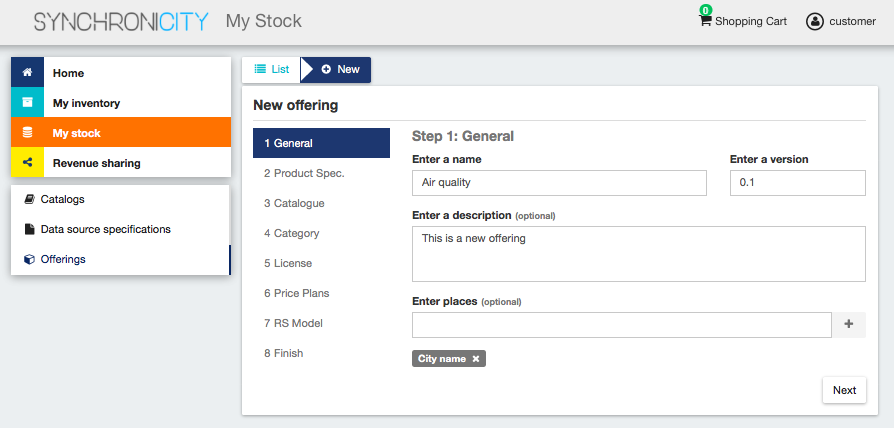
To create a new offering click on New. In the displayed form, include the basic info of the offering. Including, its name, version, an optional description, and an optional set of places where the offering is available. Once the information has been provided click on Next
In the next step, you can choose whether your offering is a bundle or not. In this case, offering bundles are logical containers that allow you to provide new pricing models when a set of offerings are acquired together. If you want to create a bundle you will be required to include at least two bundled offerings.
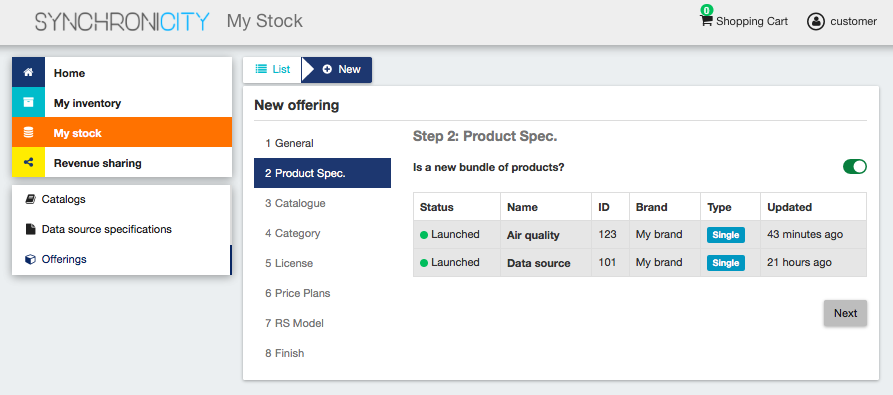
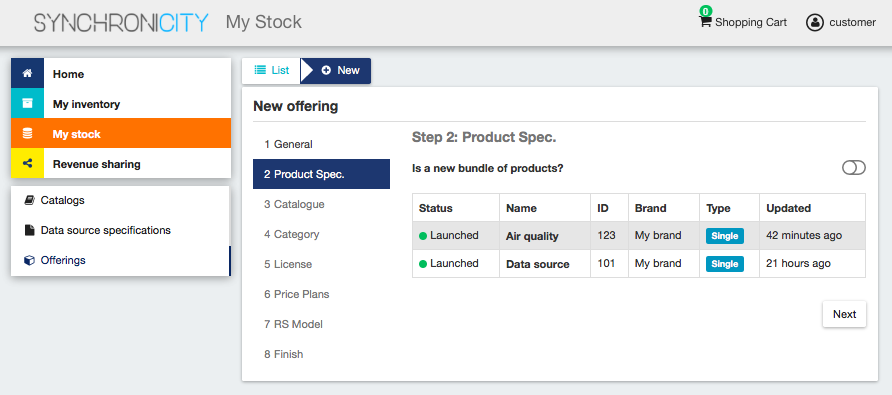
In the next step you have to select the data source specification that is going to be monetized in the current offering. Once selected click on Next.
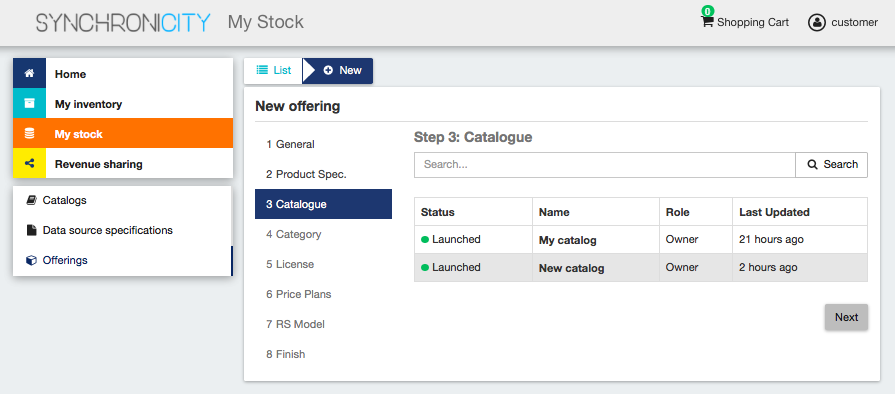
Then, you have to select the catalog where you want to publish you offering and click on Next
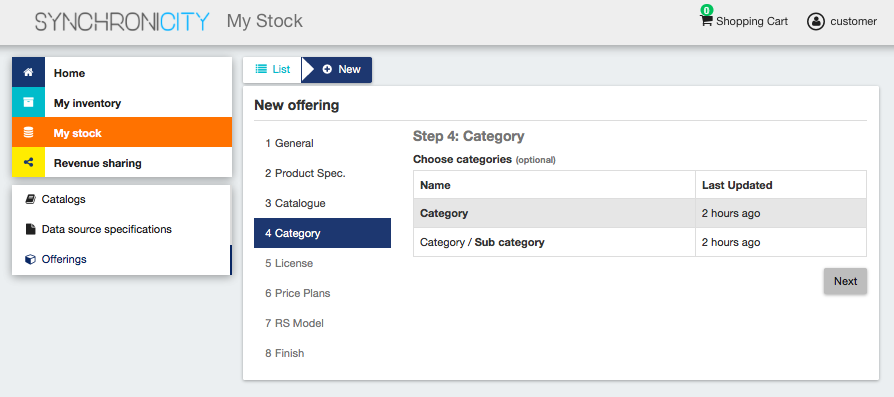
In the next step, you can optionally choose categories for you offering. Once done, click on Next
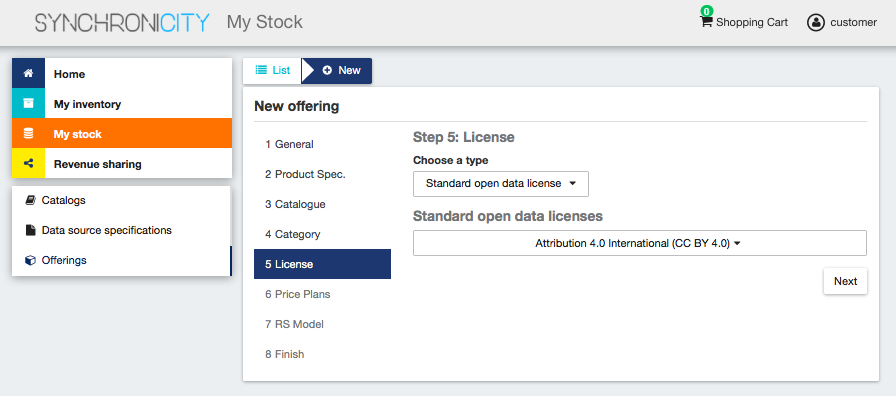
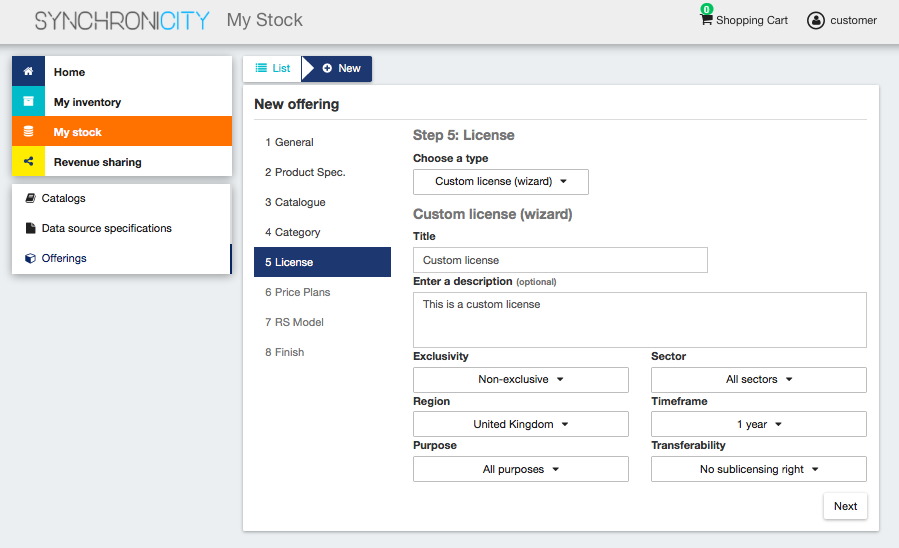
In the next step, you can specify the terms and conditions that apply to your offering and that must be accepted by those customers who want to acquire it. Note that the terms and conditions are not mandatory.
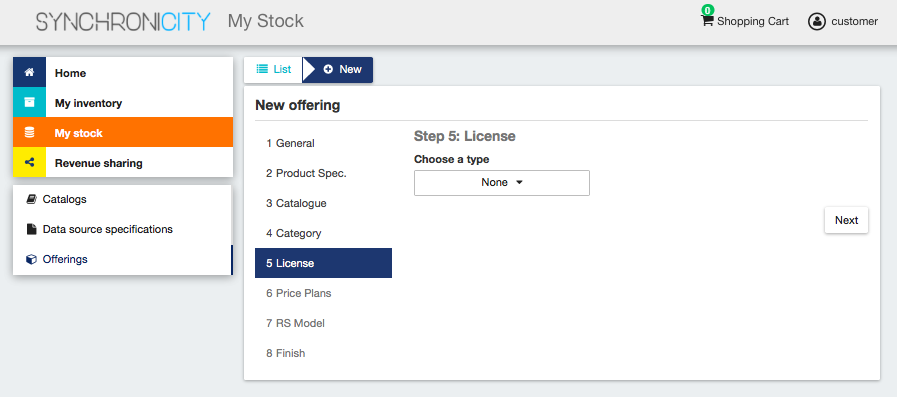
You have 3 options. You can select a standard open data license among the ones available
Or you can customize your license by using the wizard menu
Or you can describe your license by using the free-text form
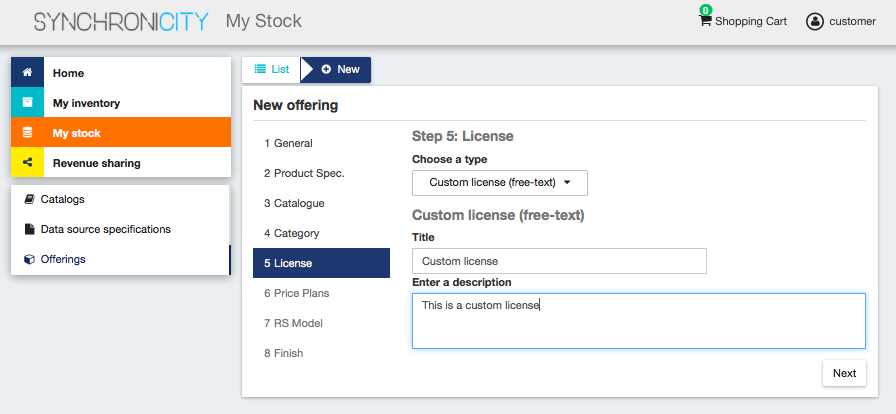
Once you have defined your license click on Next
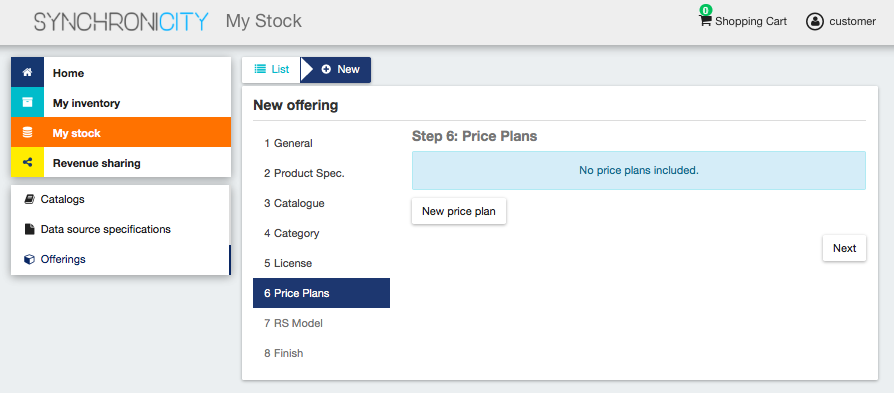
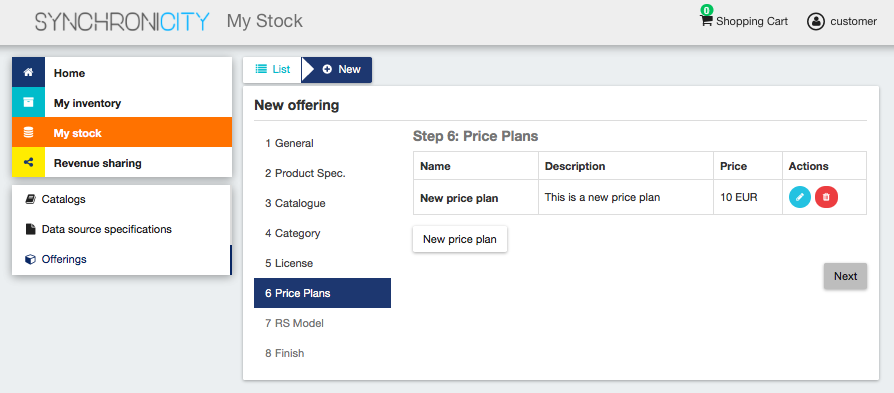
The next step is the most important for the offering. In the displayed form you can create different price plans for you offering, which will be selectable by customers when acquiring the offering. If you do not include any price plan the offering in considered free.
To include a new price plan the first step is clicking on New Price Plan
For creating the price plan, you have to provide a name, and an optional description. Then, you have to choose the type of price plan between the provided options.
The available types are: one time for payments that are made once when purchasing the offering, recurring for charges that are made periodically (e.g a monthly payment), and usage for charges that are calculated applying the pricing model to the actual usage made of the acquired service.
If you choose one time, you have to provide the price and the currency.
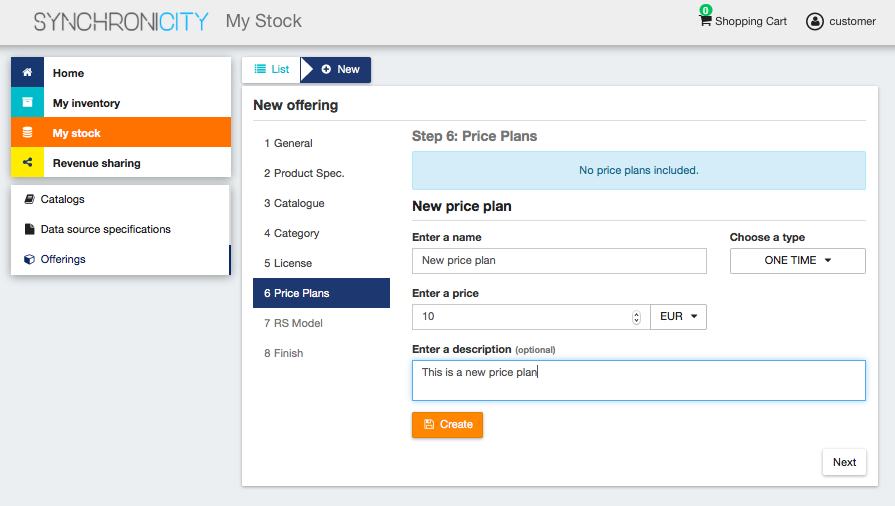
Once you have created you pricing model click on Next
In the last step of the process, you have to choose the revenue sharing model to be applied to you offering between the available ones. Once done, click on Next and then on Create.

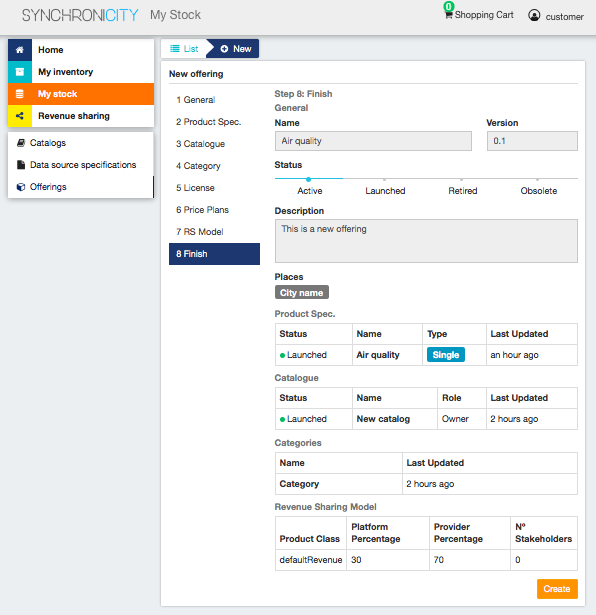
Sellers can also edit their offerings. To do that click on the offering to be updated. In the displayed form, change the fields you want to edit and click on Update. Note that for start selling you offering you have to update its status to Launched
Customer
All of the users of the system have by default the Customer role. Customers are able to create orders for acquiring offerings.
List Available Offerings
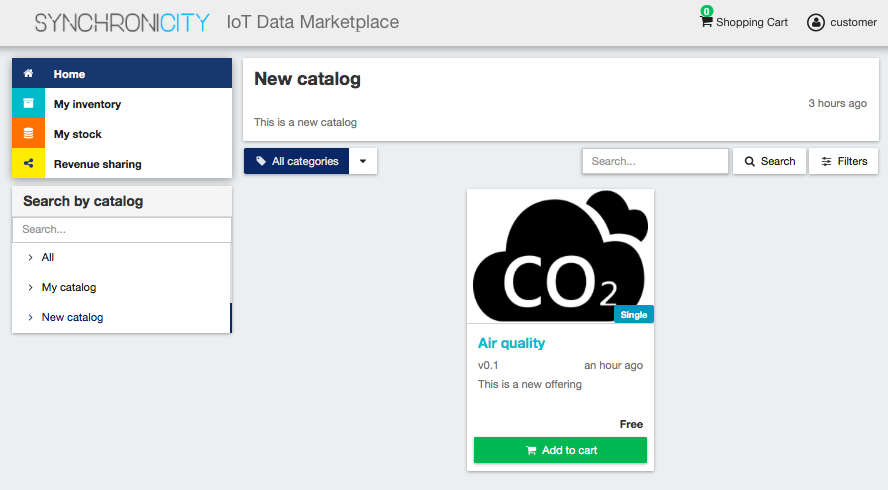
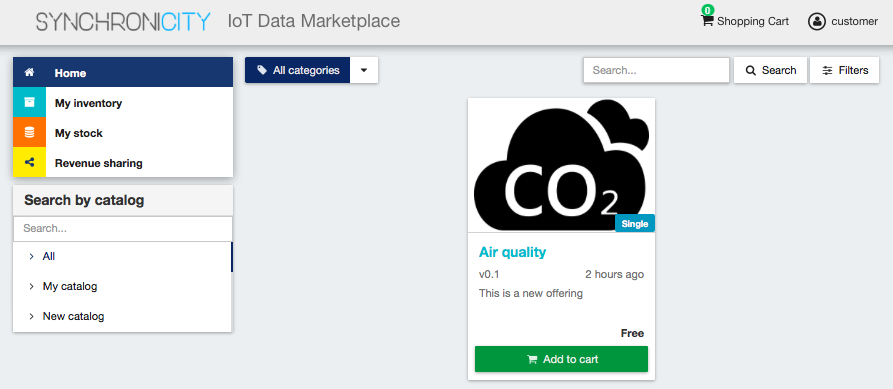
All the available (Launched) offerings appear in the Home page of the SynchroniCity IoT Data Marketplace, so they can be seen by customers. Additionally, customers can select a specific catalog of offerings by clicking on it.
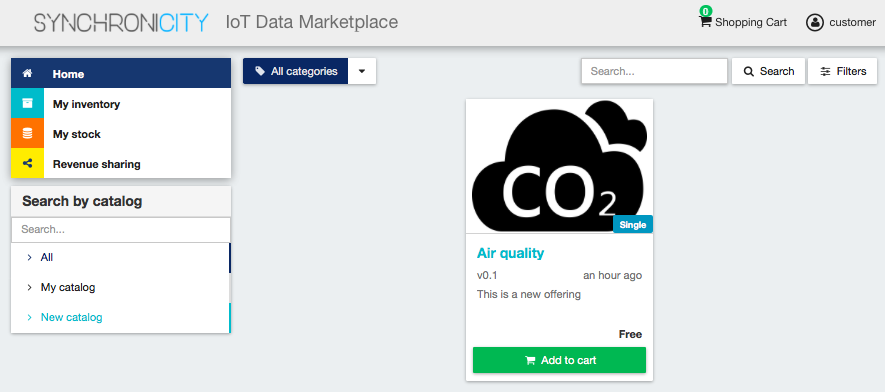
Moreover, customers can filter the shown offerings by category using the categories dropdown and choosing the wanted one.

Customers can also filter bundle or single offerings using the Filters modal as well as choosing its sorting.

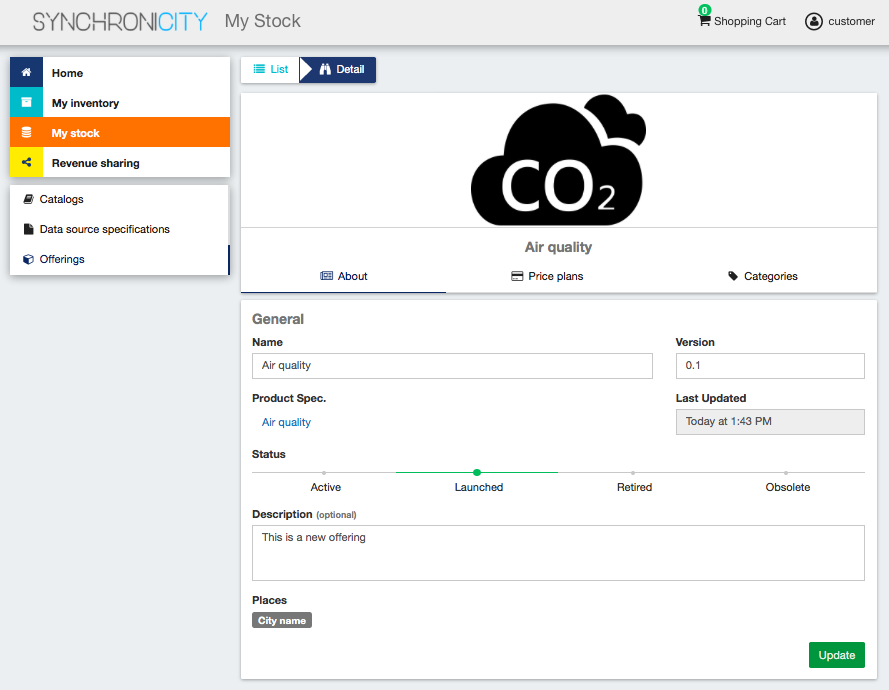
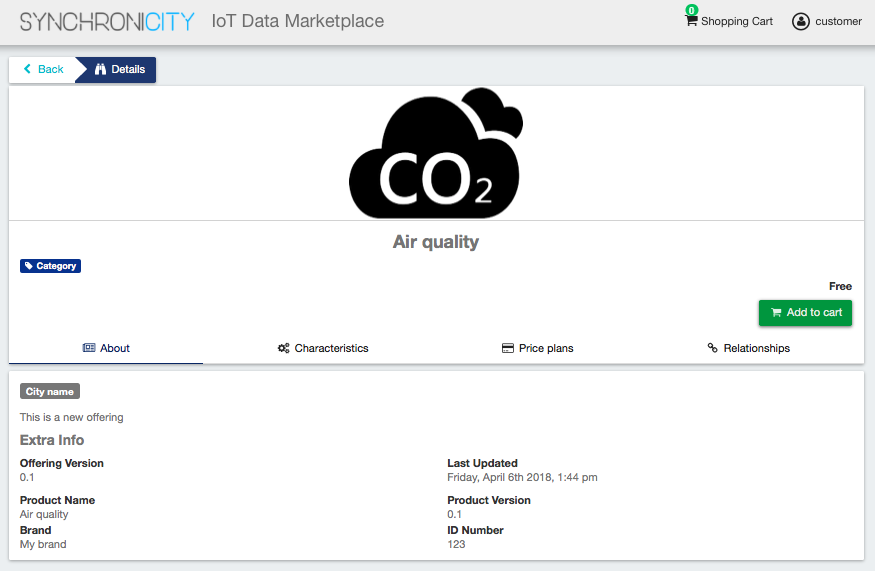
Customers can open the details of an offering by clicking on it. In the displayed view, it is shown the general info about the offering and its included data source, the characteristics of the data source, and the price plans of the offering.

Create Order
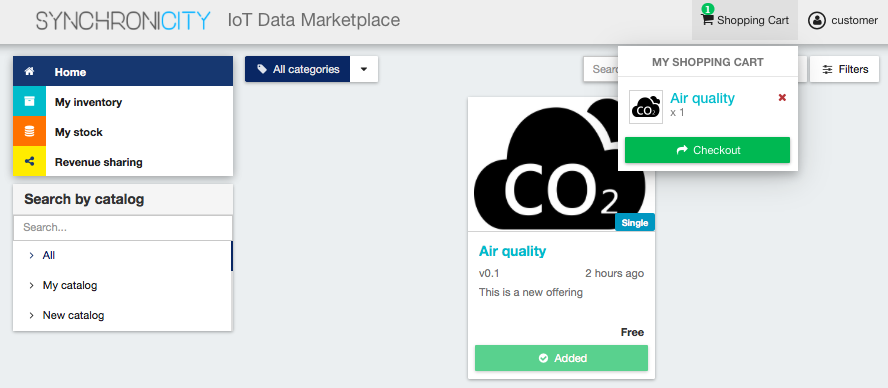
Customers can create orders for acquiring offerings. The different offerings to be included in an order are managed using the Shopping Cart.
To include an offering in the shopping cart there are two possibilities. You can click on the Add to Cart button located in the offering panel when searching, or you can click on the Add to Cart button located in the offering details view.
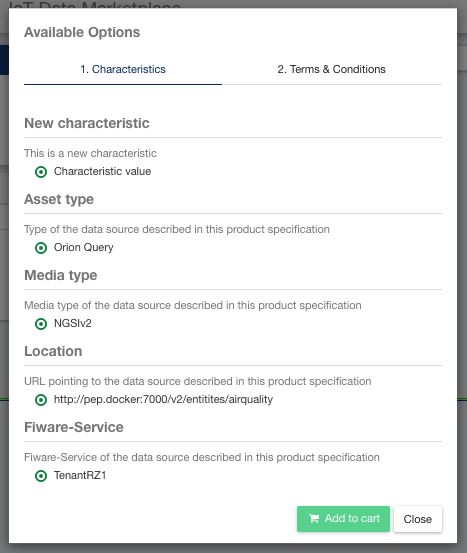
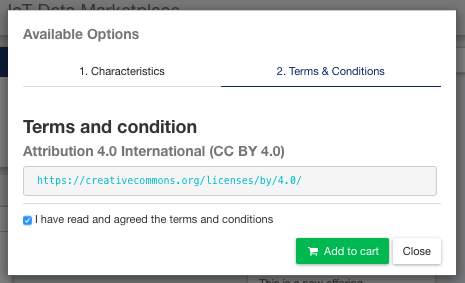
If the offering has configurable characteristics, multiple price plans or terms and conditions, a modal will be displayed where you can select your preferred options
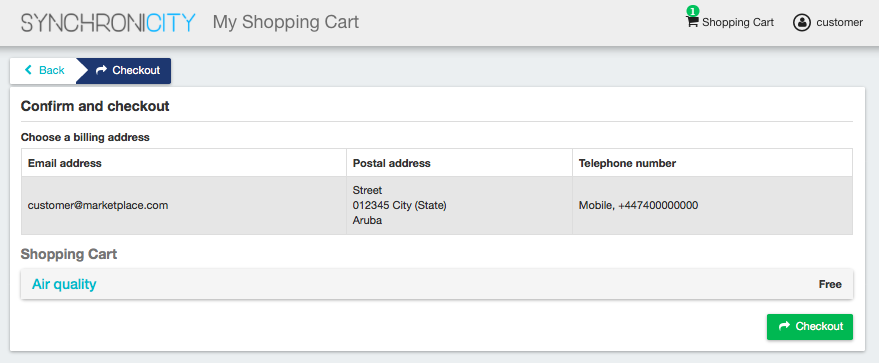
Once you have included all the offerings you want to acquire to the shopping cart, you can create the order clicking on Shopping Cart, and then on Checkout
Then, you have to select one of your billing addresses.
Once you have provided all the required information you can start the order creation clicking on Checkout
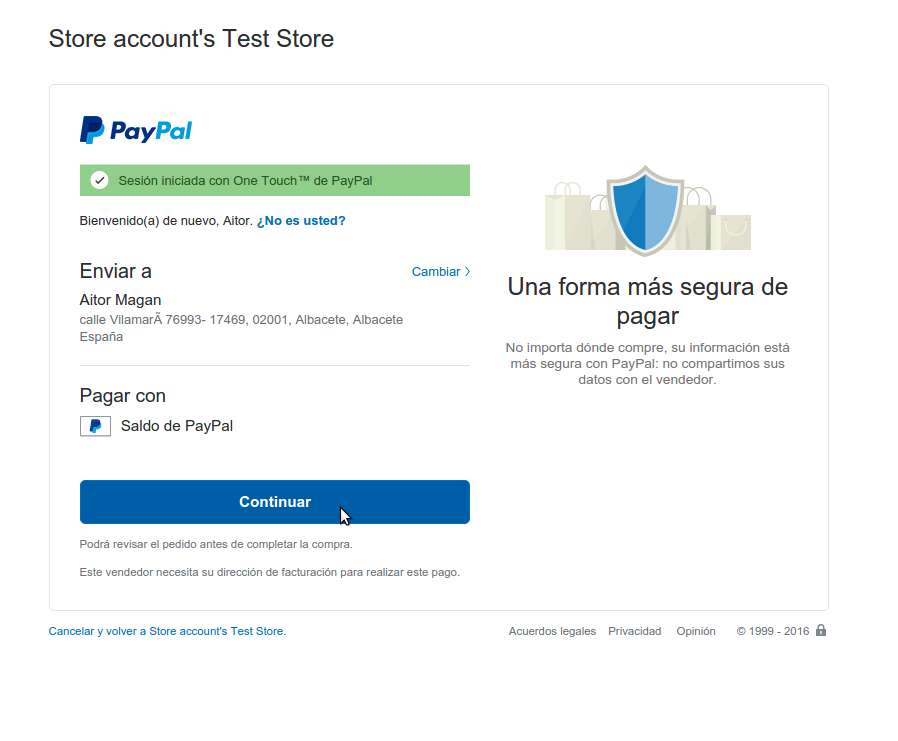
If the offering has a price plan, you will be redirected to PayPal so you can pay for the offerings according to their pricing models
Manage Acquired Data Offerings
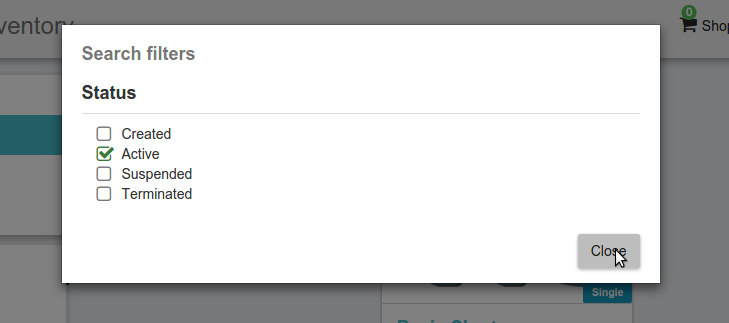
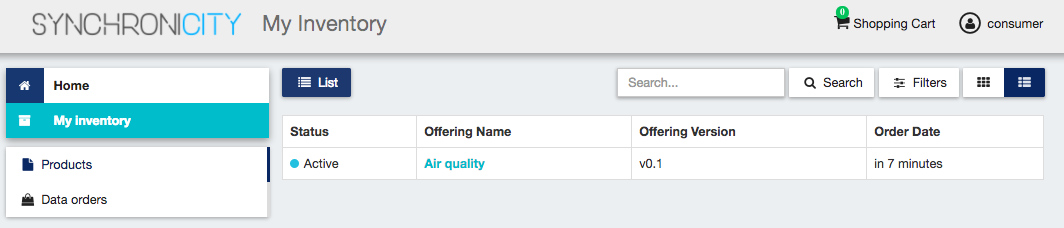
The data you have acquired are located in My Inventory, there you can list them, check their status, or retrieve the access token required to access them. In this view, it is possible to filter you data by its status. To do that click on Filters, select the related statuses, and click on Close
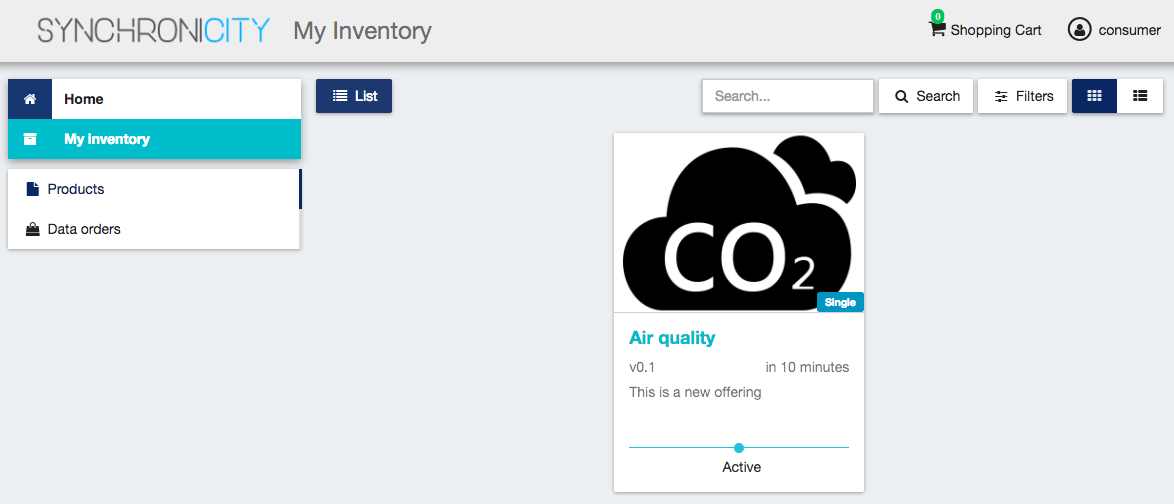
It is also possible to switch between the grid and tabular views using the related buttons
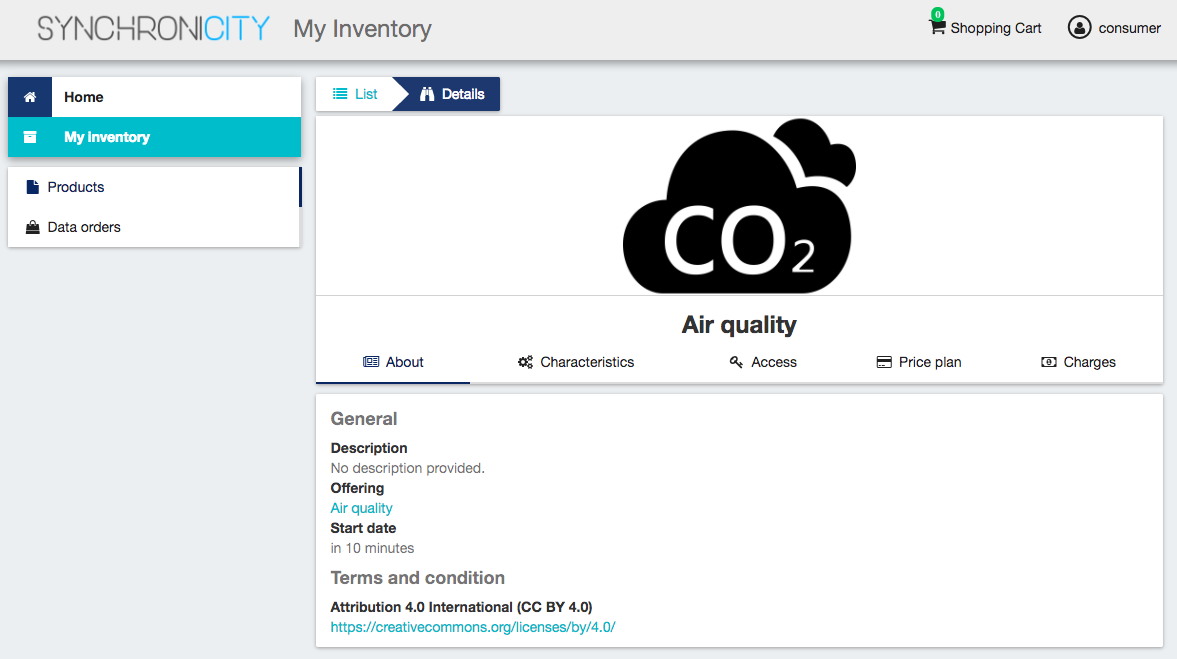
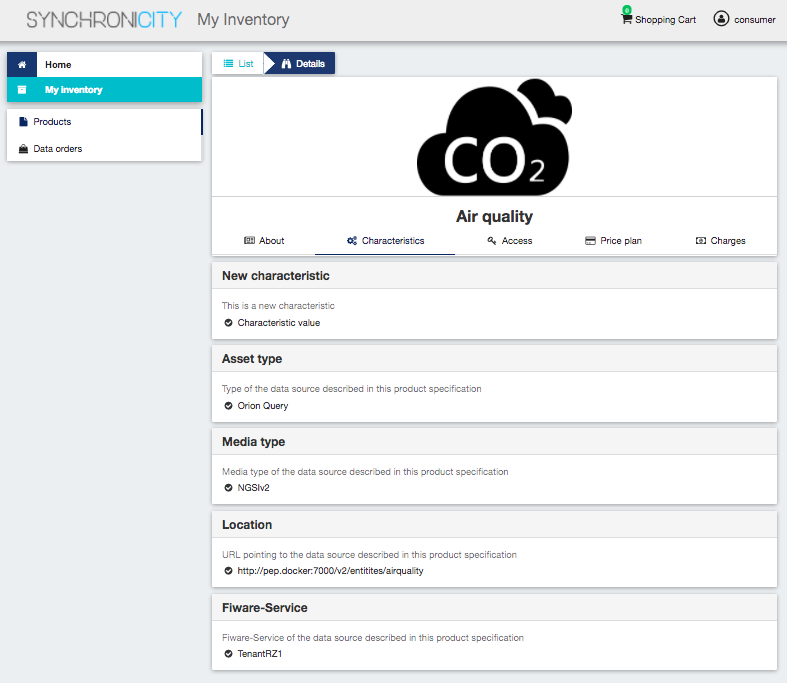
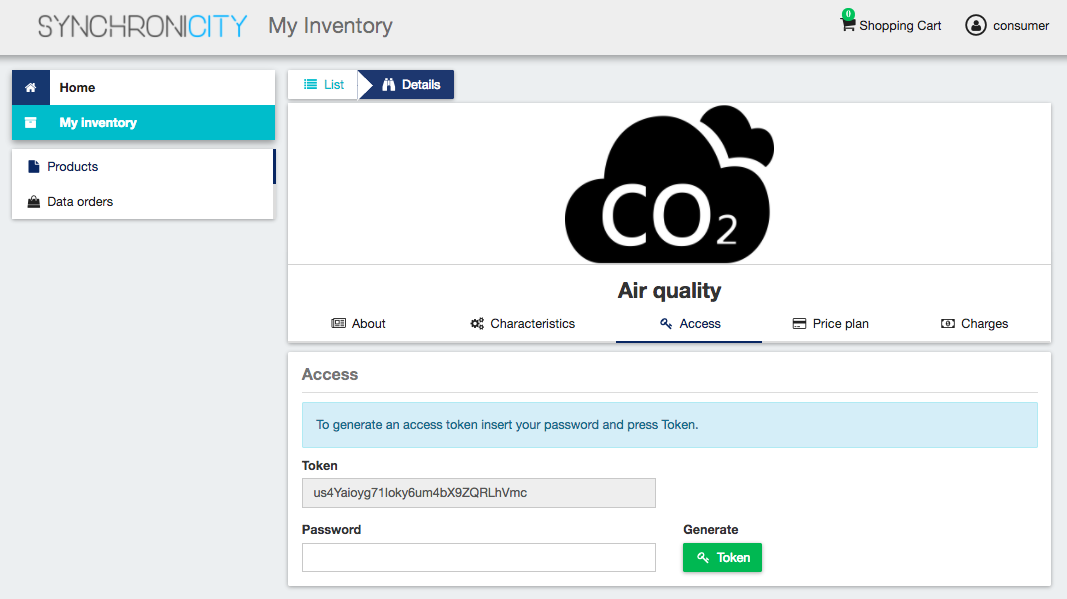
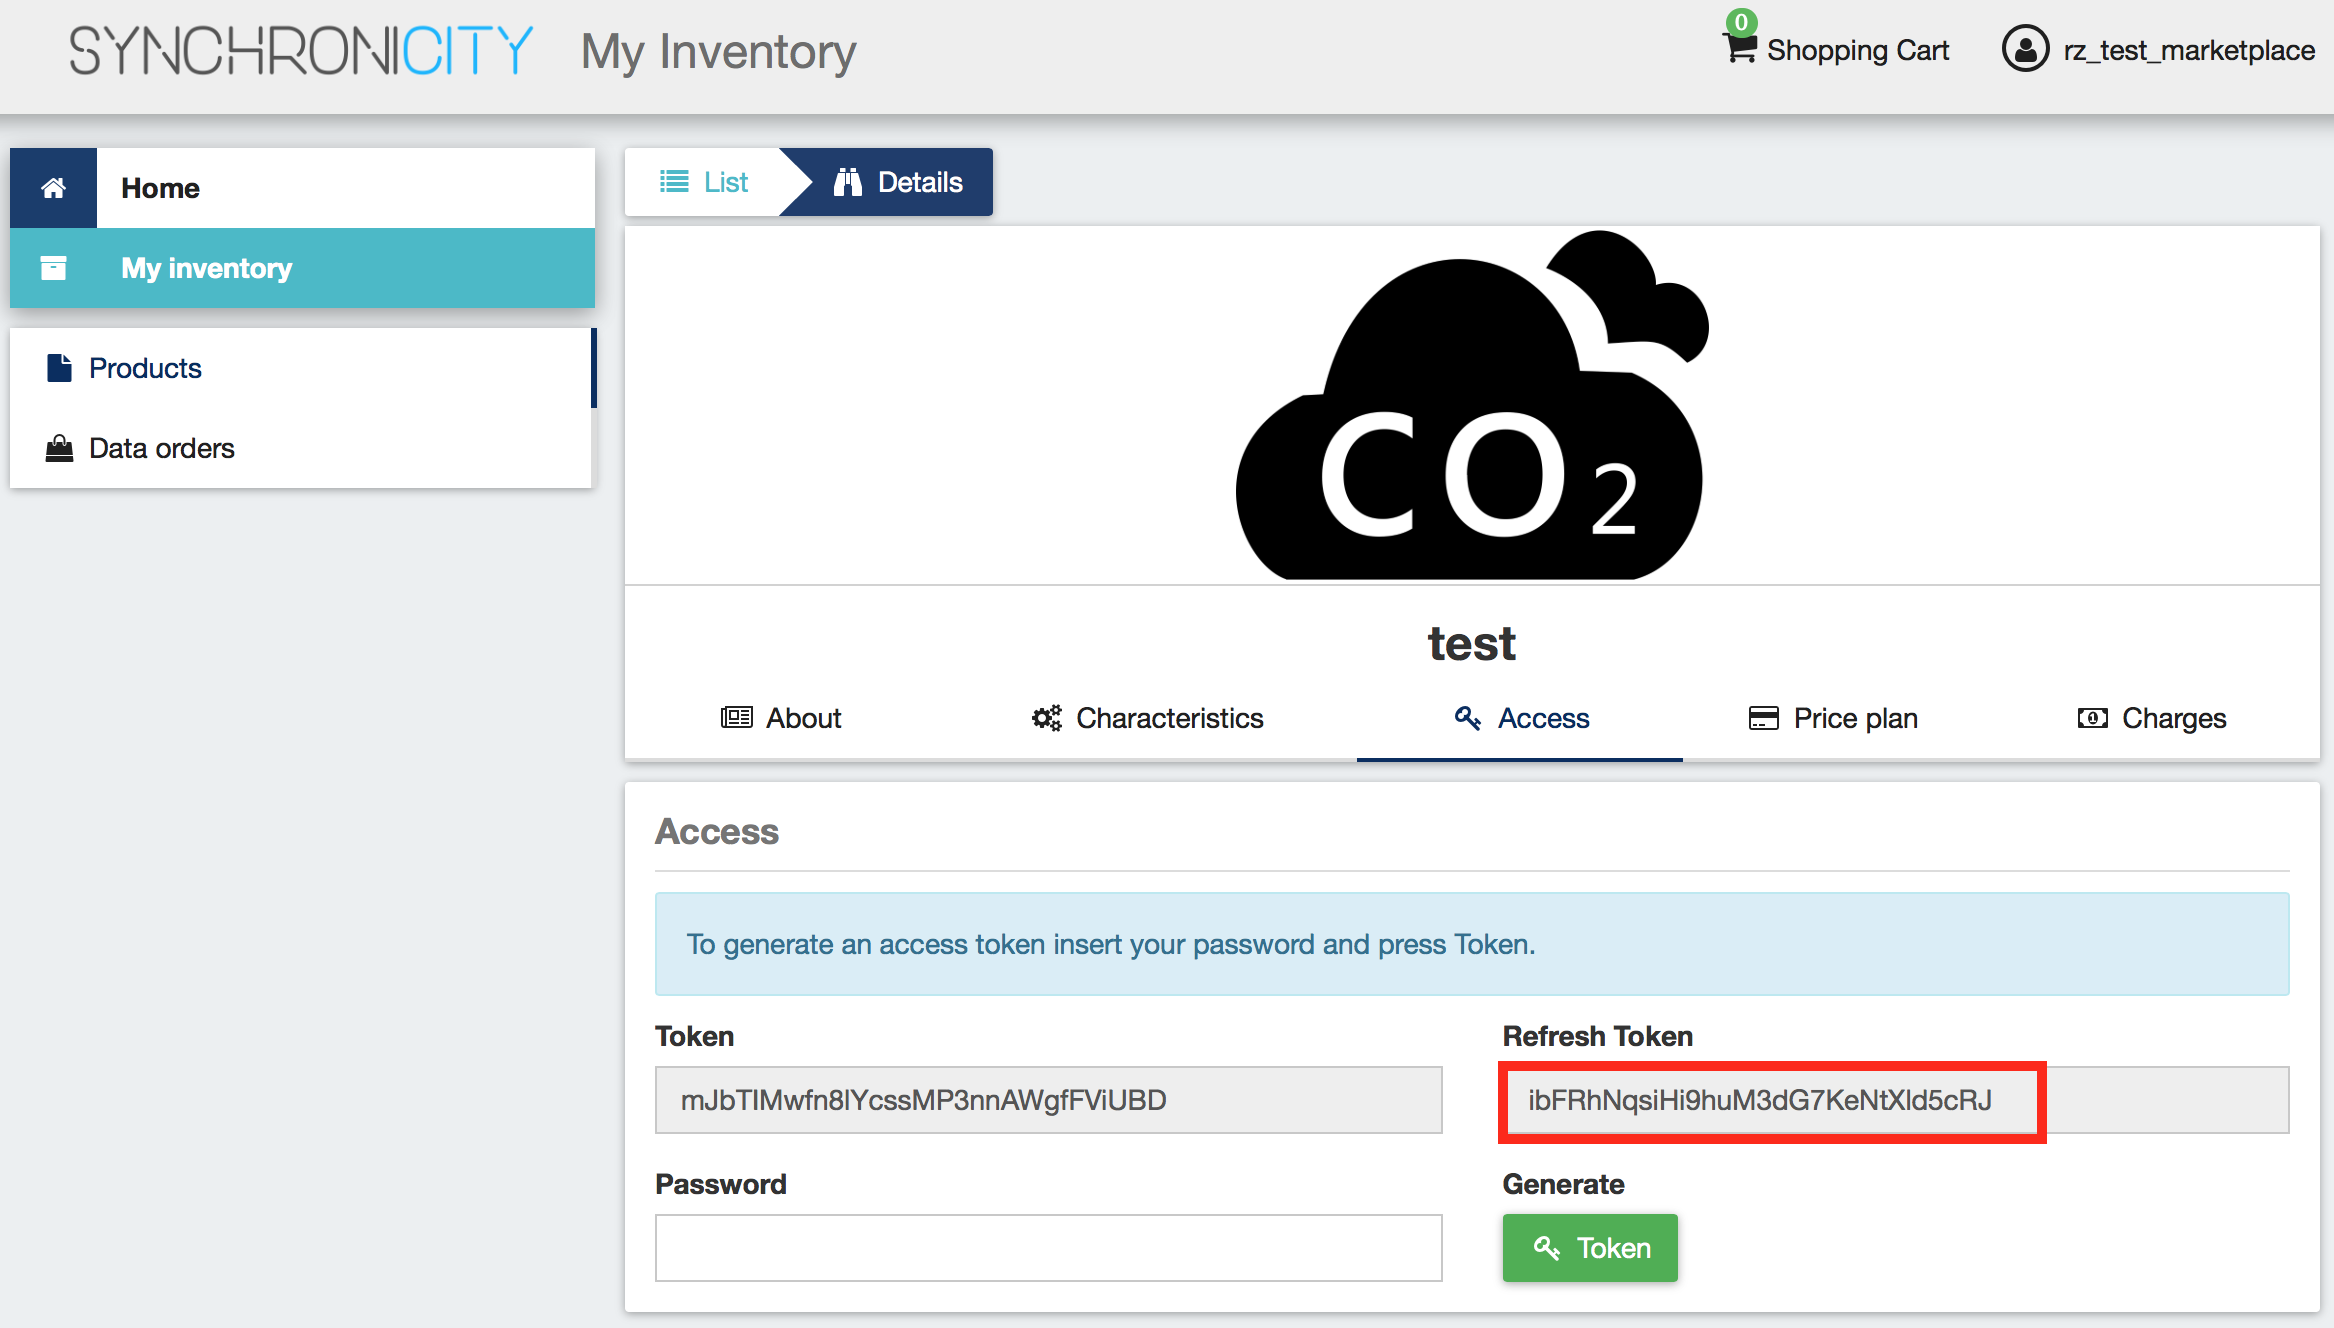
You can manage a specific acquired data source clicking on it. In the displayed view, you can see the general info of the acquired data source, and the characteristics and pricing you have selected.
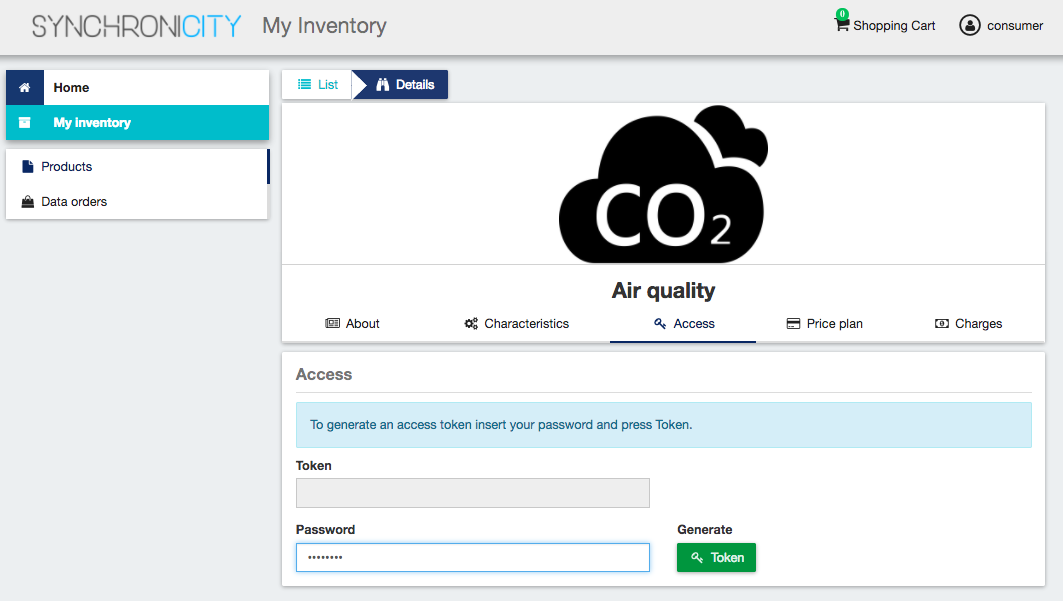
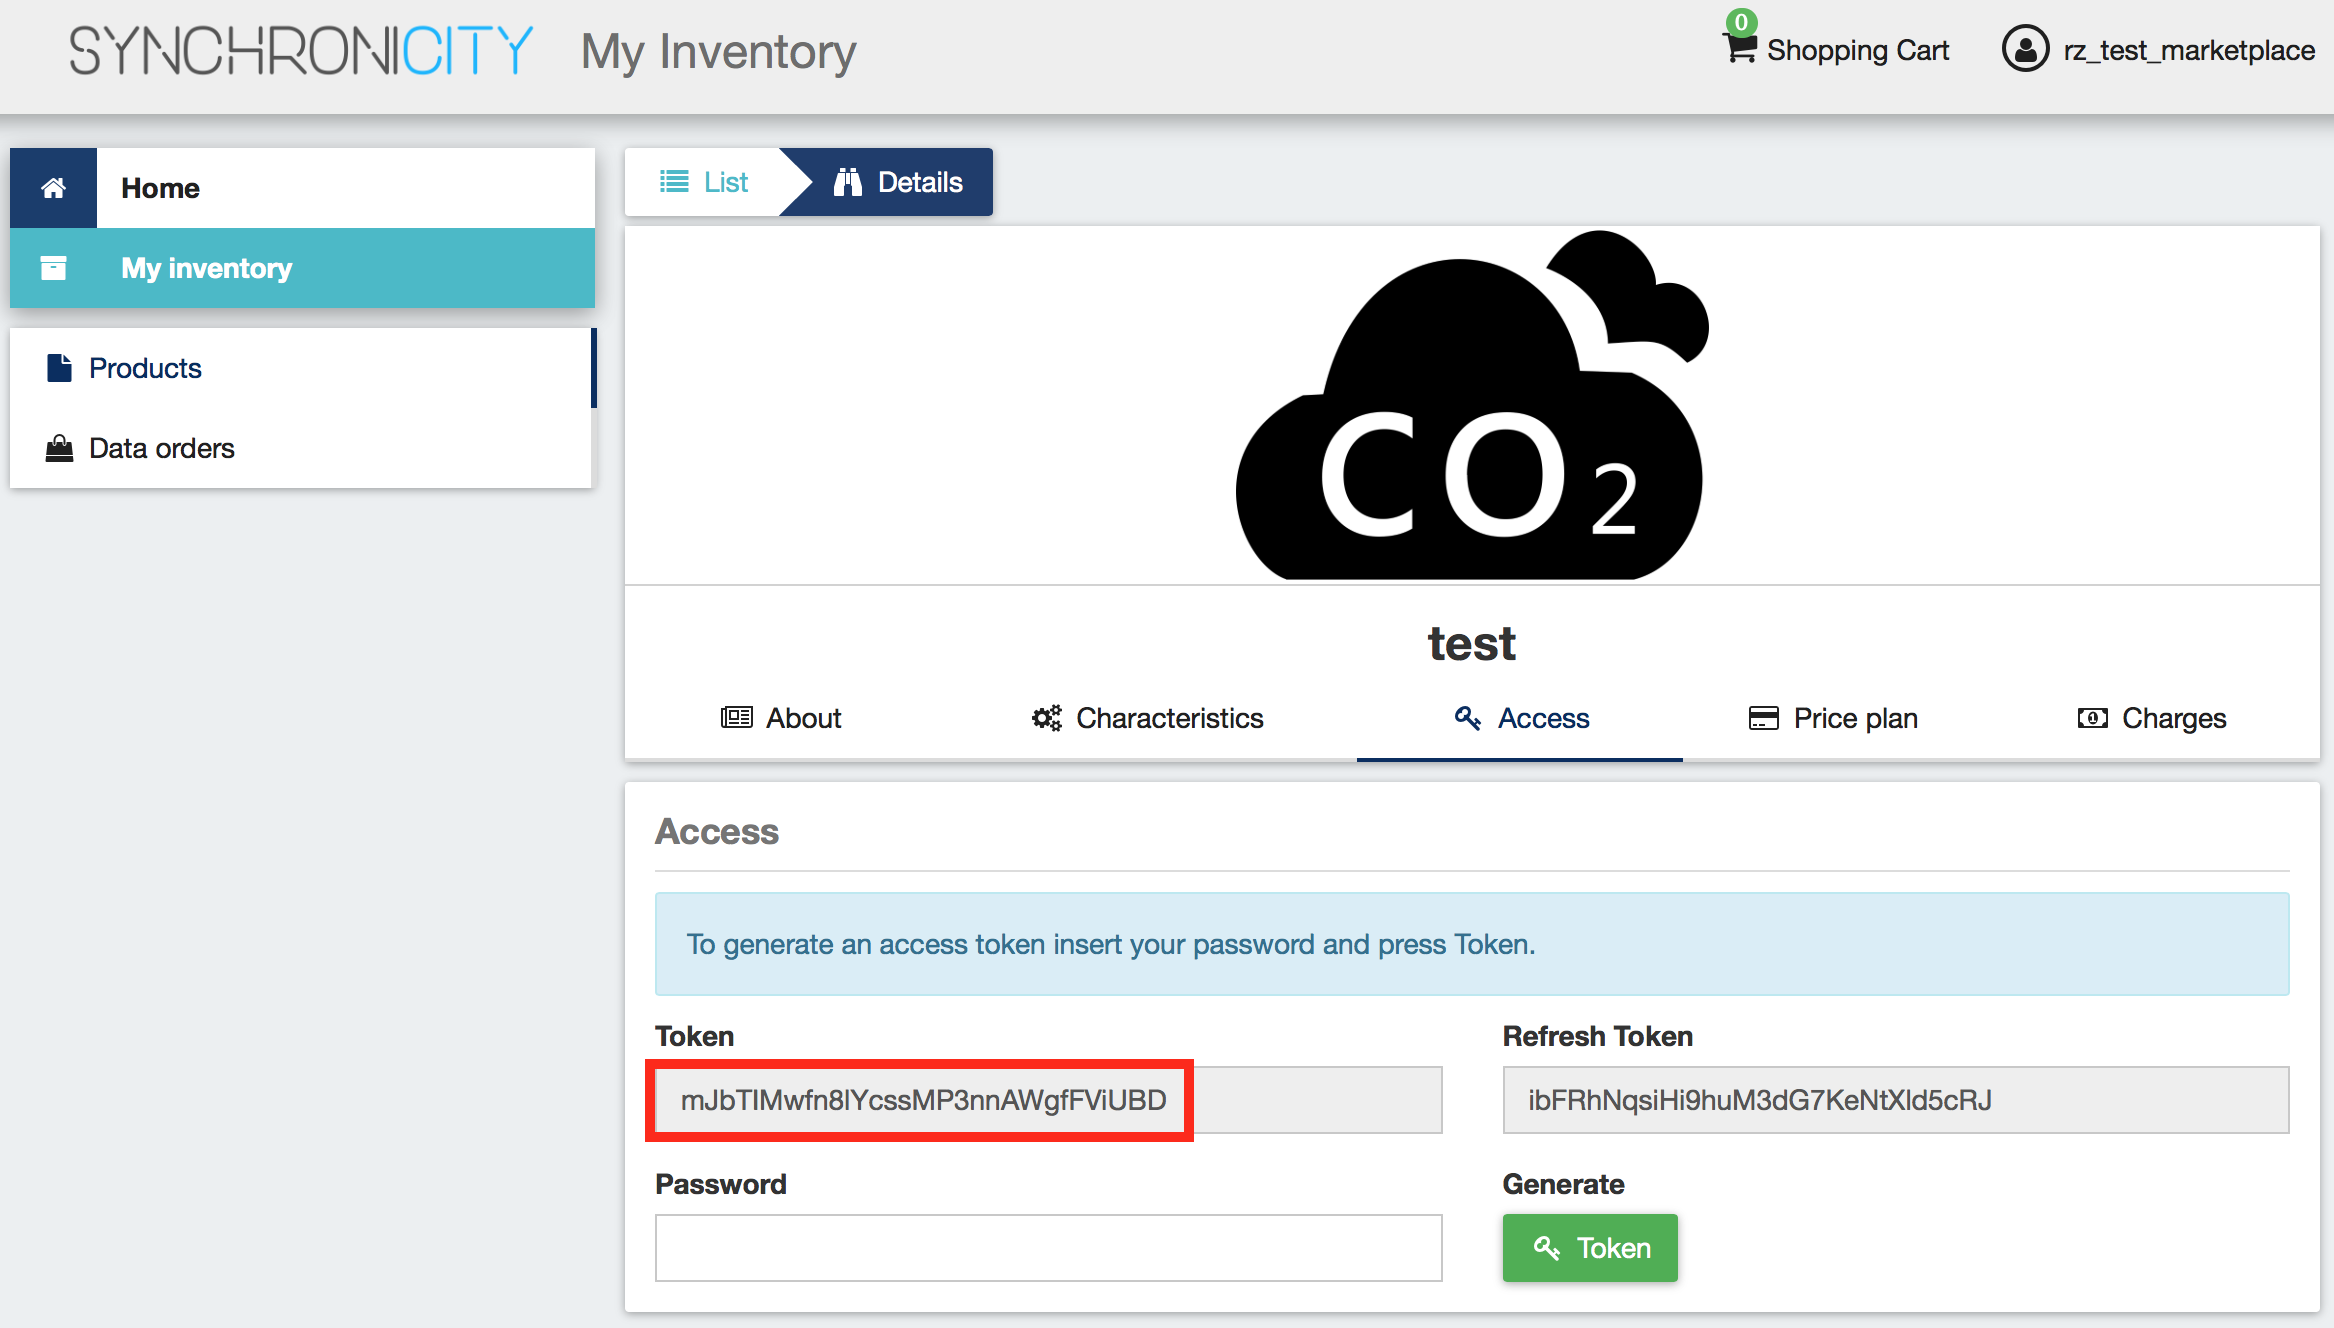
Additionally, you can generate an access token for the data source accessing to the Access tab. To generate a new access token insert your IdM password and press the Token button.
Access Acquired Data Offerings
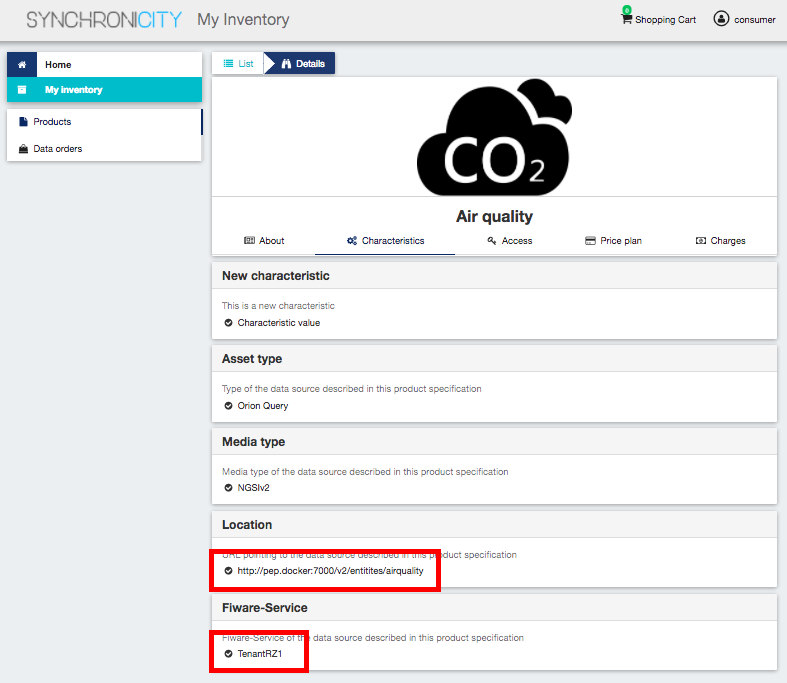
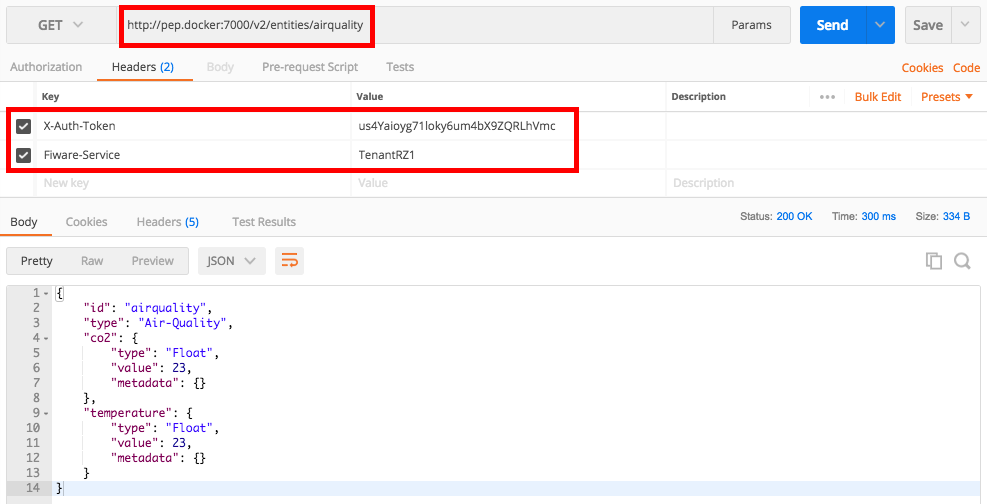
To access and consume the data you have acquired, you first need to locate on the characteristic of your data source, the url pointing to that data and the Fiware-Service, if available, related to that data.
You will also need to retrieve or generate a new token as shown in the prevoius section.
Once you have these information you can use them to create your request. In this example we are using these information, specifically the url, the X-Auth-Token, and the Fiware-Service to build a GET request by using Postman. Note that the Fiware-Service might be optional if not present in the characteristic of your data source.
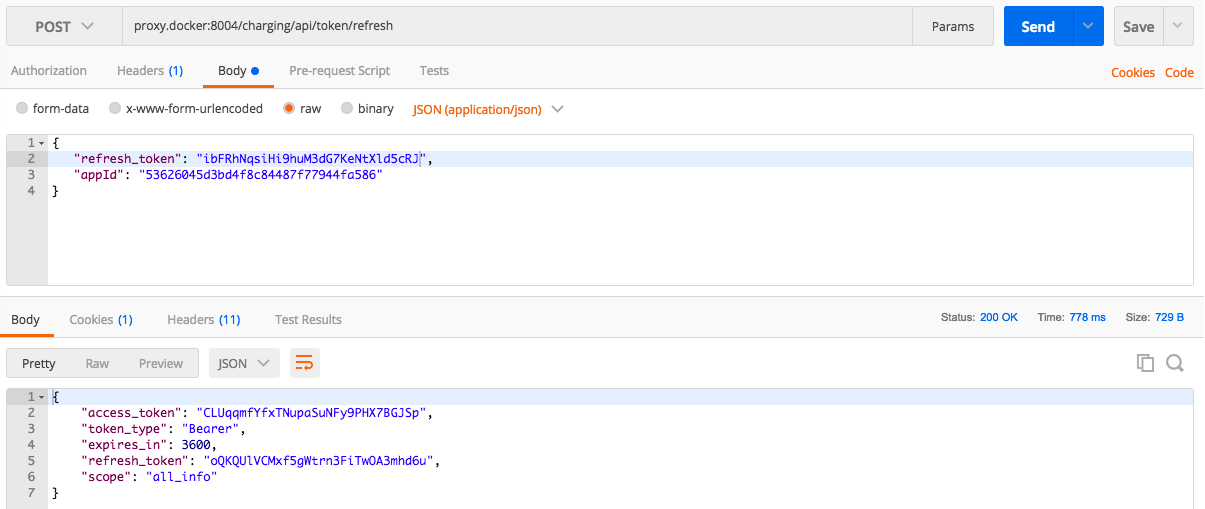
To generate a new access token without accessing to the marketplace you can use the Refresh Token
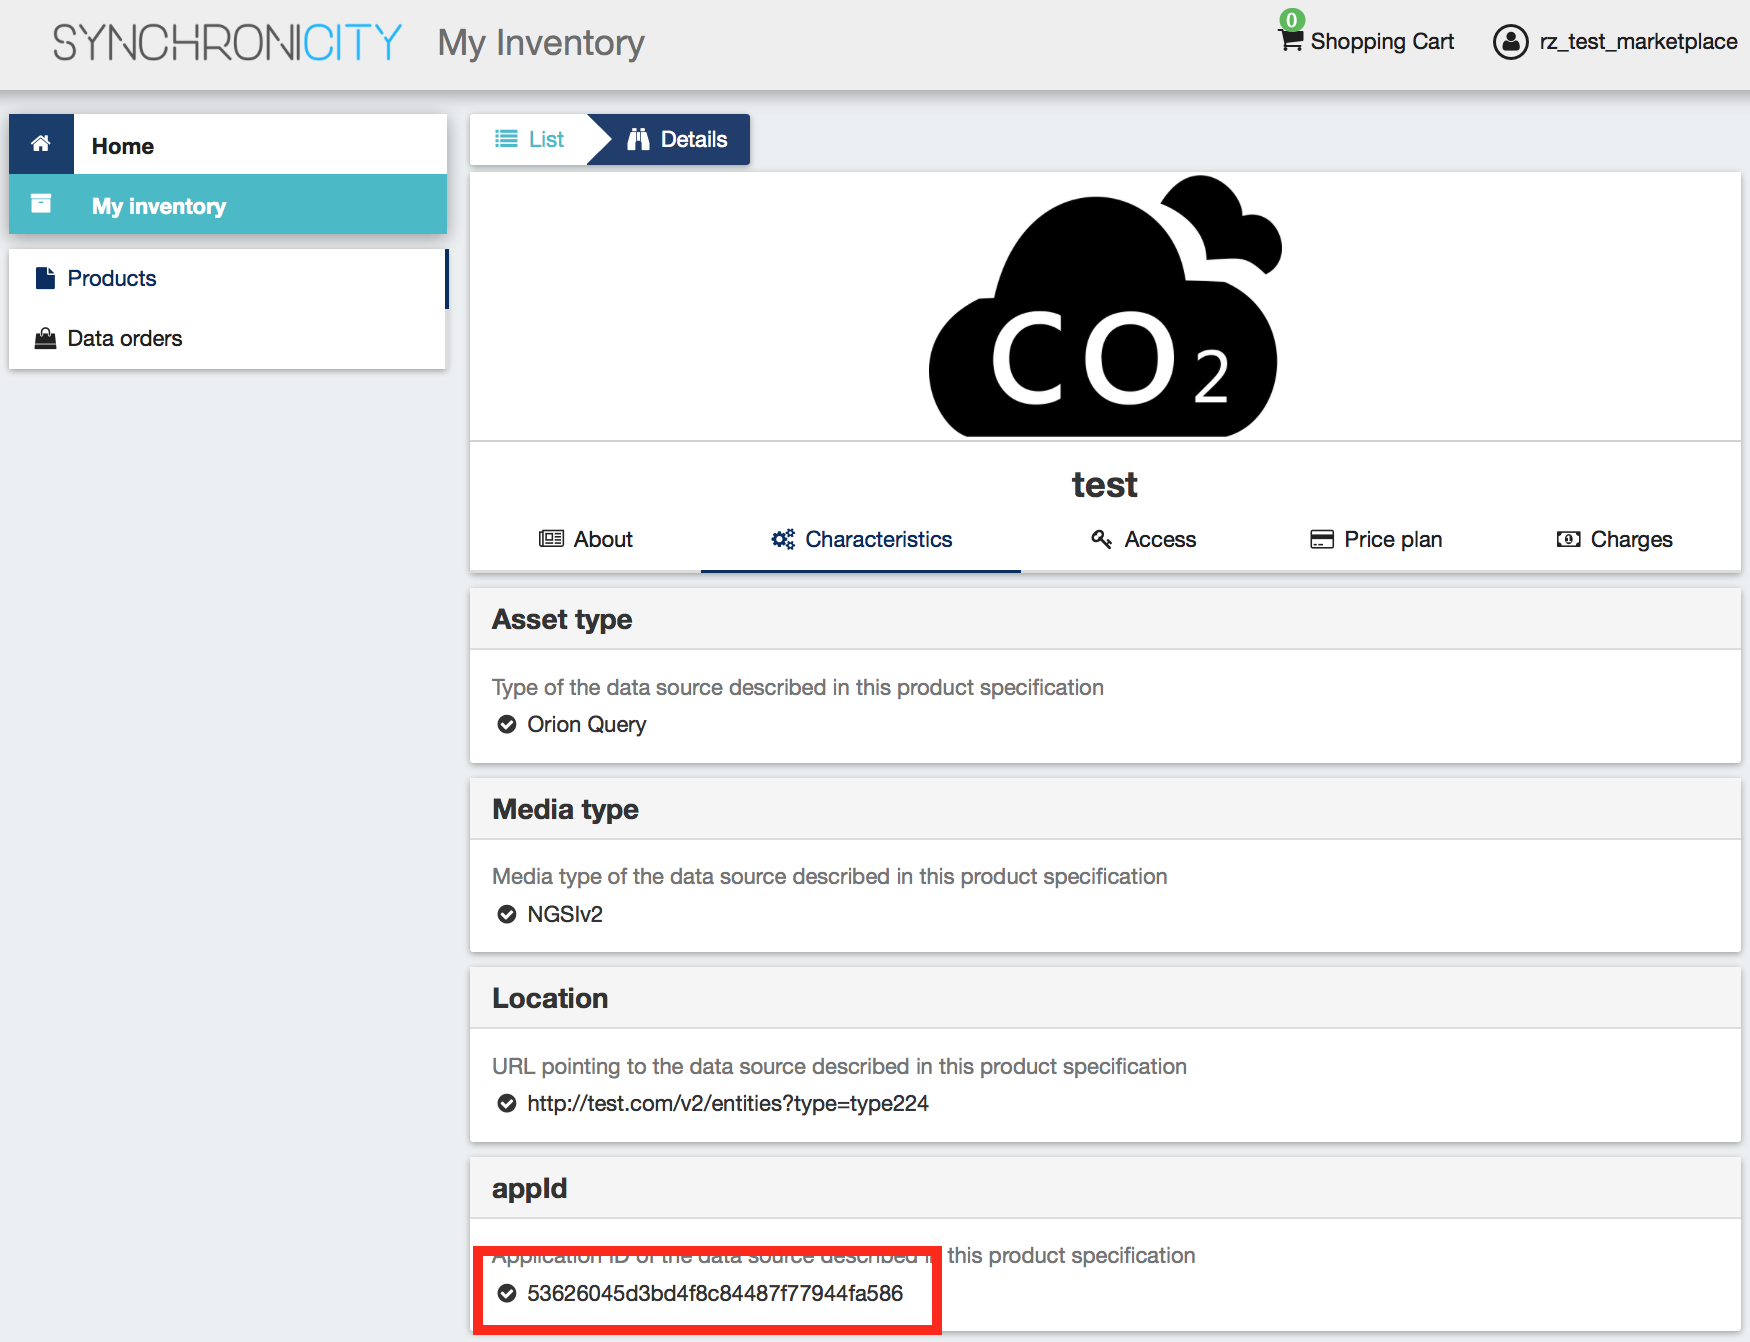
You will also need to retrieve the appId related to the data source that you wish to access. You can find the appId on the characteristic of your data source
Once you have these information you can use them to generate a new access token by performing a POST request on this API
http://[marketplace_url]:[marketplace_port]/charging/api/token/refresh
with header Content-Type: application/json and body
{
"refresh_token": "ibFRhNqsiHi9huM3dG7KeNtXld5cRJ",
"appId": "53626045d3bd4f8c84487f77944fa586"
}