Installation and Administration Guide
Introduction
This installation and administration guide covers the SynchroniCity IoT Data Marketplace based on the Business API Ecosystem version 6.4.0, corresponding to FIWARE release 6. Any feedback on this document is highly welcomed, including bugs, typos or things you think should be included but aren’t. Please send them by creating an issue at GitHub Issues
Installation
The SynchroniCity IoT Data Marketplace can be deployed with Docker. For all the components that made up the SynchroniCity IoT Data Marketplace (based on the Business API Ecosystem it has been provided a Docker image that can be used jointly with docker-compose in order to deploy and configure the ecosystem.
Requirements
The SynchroniCity IoT Data Marketplace is not a single software, but a set of modules that work together for proving business capabilities. In this regard, this section contains the basic dependencies of the different components that made up the SynchroniCity IoT Data Marketplace.
Note
The SynchroniCity IoT Data Marketplace requires instances of MySQL and MongoDB running. In this regard, you have three possibilities:
- You can have your own instances deployed in your machine
- You can manually run docker containers before executing the SynchroniCity IoT Data Marketplace
- You can use docker-compose to automatically deploy both components
OAuth2 Authentication requirements
The SynchroniCity IoT Data Marketplace authenticates with the [FIWARE identity manager](http://fiware-idm.readthedocs.io/en/latest/). It is needed to register an application in this portal in order to acquire the OAuth2 credentials.
There you have to use the following info for registering the app:
- Name: The name you want for your instance
- URL: Host and port where you plan to run the instance. [http]|https://host:port/
- Callback URL: URL to be called in the OAuth process. [http]|https://host:port/auth/fiware/callback
You must also create a new role called ‘seller’ and assign this role to the user authorized to be seller (data provider) in the marketplace.
Deploying the SynchroniCity IoT Data Marketplace
As stated, it is possible to deploy the SynchroniCity IoT Data Marketplace using the Docker images available for each of its modules with docker-compose. In particular, the following images have to be deployed:
- bae-apis-synchronicity (https://hub.docker.com/r/angelocapossele/bae-apis-synchronicity/): Image including the TMForum APIs
- biz-ecosystem-rss (https://hub.docker.com/r/conwetlab/biz-ecosystem-rss/): Image Including the BAE RSS module
- charging-backend-synchronicity (https://hub.docker.com/r/angelocapossele/charging-backend-synchronicity/): Image including the charging backend module
- logic-proxy-synchronicity (https://hub.docker.com/r/conwetlab/angelocapossele/logic-proxy-synchronicity/): Image including the logic proxy module
For deploying the SynchroniCity IoT Data Marketplace the first step is creating a docker-compose.yml file with the following contents (or use the one provided in this GitHub repo):
version: '3'
services:
    mongo:
        image: mongo:3.2
        restart: always
        ports:
            - 27017:27017
        networks:
            main:
        volumes:
            - ./mongo-data:/data/db

    mysql:
        image: mysql:latest
        restart: always
        ports:
            - 3333:3306
        volumes:
            - ./mysql-data:/var/lib/mysql
        networks:
            main:
        environment:
            - MYSQL_ROOT_PASSWORD=my-secret-pw
            - MYSQL_DATABASE=RSS

    charging:
        image: angelocapossele/charging-backend-synchronicity:v6.4.0
        restart: always
        links:
            - mongo
        depends_on:
            - mongo
            - apis
            - rss
        ports:
            - 8006:8006
        networks:
            main:
                aliases:
                    - charging.docker
        volumes:
            - ./charging-bills:/business-ecosystem-charging-backend/src/media/bills
            - ./charging-assets:/business-ecosystem-charging-backend/src/media/assets
            - ./charging-plugins:/business-ecosystem-charging-backend/src/plugins
            - ./charging-settings:/business-ecosystem-charging-backend/src/user_settings
        environment:
        - PAYPAL_CLIENT_ID=client_id_here
        - PAYPAL_CLIENT_SECRET=client_secret_here

    proxy:
        image: angelocapossele/logic-proxy-synchronicity:v6.4.0
        restart: always
        links:
            - mongo
        depends_on:
            - mongo
            - apis
        ports:
            - 8004:8004
        networks:
            main:
                aliases:
                    - proxy.docker
        volumes:
            - ./proxy-conf:/business-ecosystem-logic-proxy/etc
            - ./proxy-indexes:/business-ecosystem-logic-proxy/indexes
            - ./proxy-themes:/business-ecosystem-logic-proxy/themes
            - ./proxy-static:/business-ecosystem-logic-proxy/static
        environment:
            - NODE_ENV=development

    apis:
        image: angelocapossele/bae-apis-synchronicity:v6.4.0
        restart: always
        ports:
            - 4848:4848
            - 8080:8080
        links:
            - mysql
        depends_on:
            - mysql
        networks:
            main:
                aliases:
                    - apis.docker
        volumes:
            - ./apis-conf:/etc/default/tmf/
        environment:
            - MYSQL_ROOT_PASSWORD=my-secret-pw
            - MYSQL_HOST=mysql

    rss:
        image: conwetlab/biz-ecosystem-rss:v6.4.0
        restart: always
        ports:
            - 9999:8080
            - 4444:4848
            - 1111:8181
        links:
            - mysql
        depends_on:
            - mysql
        networks:
            main:
                aliases:
                    - rss.docker
        volumes:
            - ./rss-conf:/etc/default/rss

networks:
    main:
        external: true
Configuration
The next step is providing all the configuration files required by the different components using the configured volumes. It is possible to find valid configuration files (as well as the docker-compose.yml) in this GitHub repo.
As you can see, the different modules include environment variables and volumes. In particular:
Charging
The charging-backend-synchronicity needs the following environment variables:
- PAYPAL_CLIENT_ID: the client id of your application PayPal credentials used for charging users (a Sandbox account can be used for testing).
- PAYPAL_CLIENT_SECRET: the client secret of your application PayPal credentials used for charging users (a Sandbox account can be used for testing).
Additionally, the charging-backend-synchronicity image contains 4 volumes. In particular:
- /business-ecosystem-charging-backend/src/media/bills: This directory contains the PDF invoices generated by the Business Ecosystem Charging Backend
- /business-ecosystem-charging-backend/src/media/assets: This directory contains the different digital assets uploaded by sellers to the Business Ecosystem Charging Backend
- /business-ecosystem-charging-backend/src/plugins: This directory is used for providing asset plugins (see section Installing the Orion Query Plugin)
- /business-ecosystem-charging-backend/src/user_settings: This directory must include the settings.py and services_settings.py files with the software configuration.
More specifically, the services_settings.py includes:
- KEYSTONE_PROTOCOL: http or https
- KEYSTONE_HOST: host where is running the IDM (e.g., ‘idm.docker’)
- KEYROCK_PORT: port number where the Keyrock instance is listening (e.g., ‘8000’)
- KEYSTONE_PORT: port number where the Keystone instance is listening (e.g., ‘5000’)
- KEYSTONE_USER: admin username of the IDM (e.g., ‘idm’)
- KEYSTONE_PWD: admin password of the IDM (e.g., ‘idm’)
- ADMIN_DOMAIN: admin domain on the IDM (e.g., ‘Default’)
- APP_CLIENT_ID: Client ID of the Orion context broker registered on the IDM
- APP_CLIENT_SECRET: Client Secret of the Orion Context Broker registered on the IDM
Logic Proxy
The logic-proxy-synchronicity image contains 4 volumes. In particular:
- /business-ecosystem-logic-proxy/etc: This directory must include the config.js file with the software configuration
- /business-ecosystem-logic-proxy/indexes: This directory contains the indexes used by the SynchroniCity IoT Data Marketplace for searching
- /business-ecosystem-logic-proxy/themes: This directory contains the themes that can be used to customize the web portal
- /business-ecosystem-logic-proxy/static: This directory includes the static files ready to be rendered including the selected theme and js files
Finally, the logic-proxy-synchronicity uses the environment variable NODE_ENV to determine if the software is being used in development or in production mode.
Note
The config.js file must include an extra setting not provided by default called config.extPort that must include the port where the proxy is going to run in the host machine
Once you have created the files, run the following command
$ docker-compose up
Then, the SynchroniCity IoT Data Marketplace should be up and running in http://YOUR_HOST:PORT/ replacing YOUR_HOST by the host of your machine and PORT by the port provided in the Business Ecosystem Logic Proxy configuration
Once the different containers are running, you can stop them using
$ docker-compose stop
And start them again using
$ docker-compose start
Additionally, you can terminate the different containers by executing
$ docker-compose down
Installing the Orion Query Plugin
The SynchroniCity IoT Data Marketplace is intended to support the monetization of different kind of data sources. The different kind of data sources that may be wanted to be monetized will be heterogeneous and potentially very different between them.
Additionally, for each type of data source different validations and activation mechanisms will be required. For example, if the data source is an NGSI entity, it will be required to validate that the provider is the owner of that entity. Moreover, when a customer acquires the access to that entity, it will be required to notify the Identity Management component that a new user has access to it.
The huge differences between the different types of data sources that can be monetized in the SynchroniCity IoT Data Marketplace makes impossible to include its validations and characteristics as part of the core software. For this reason, it has been created a plugin based solution, where all the characteristics of a data source type are implemented in a plugin that can be loaded in the SynchroniCity IoT Data Marketplace.
As you may know, the SynchroniCity IoT Data Marketplace is able to sell NGSI compliant data sources. To support this functionality, it must be installed the Orion Query plugin (also included in this GitHub repo) as follows
Copy the plugin file into the host directory of the volume /business-ecosystem-charging-backend/src/plugins
Enter the running container
$ docker exec -i -t your-container /bin/bash
Go to the installation directory
$ cd /apis/business-ecosystem-charging-backend/src
Load the plugin
$ ./manage.py loadplugin ./plugins/Orion.zip
Restart Apache
$ service apache2 restart
Note
For specific details on how to create a plugin and its internal structure, have a look at the Business API Ecosystem Programmer Guide
Sanity Check Procedures
The Sanity Check Procedures are the steps that a System Administrator will take to verify that an installation is ready to be tested. This is therefore a preliminary set of tests to ensure that obvious or basic malfunctioning is fixed before proceeding to unit tests, integration tests and user validation.
End to End Testing
Please note that the following information is required before starting with the process: * The host and port where the Proxy is running * A valid IdM user with the Seller role
To Check if the SynchroniCity IoT Data Marketplace is running, follow the next steps:
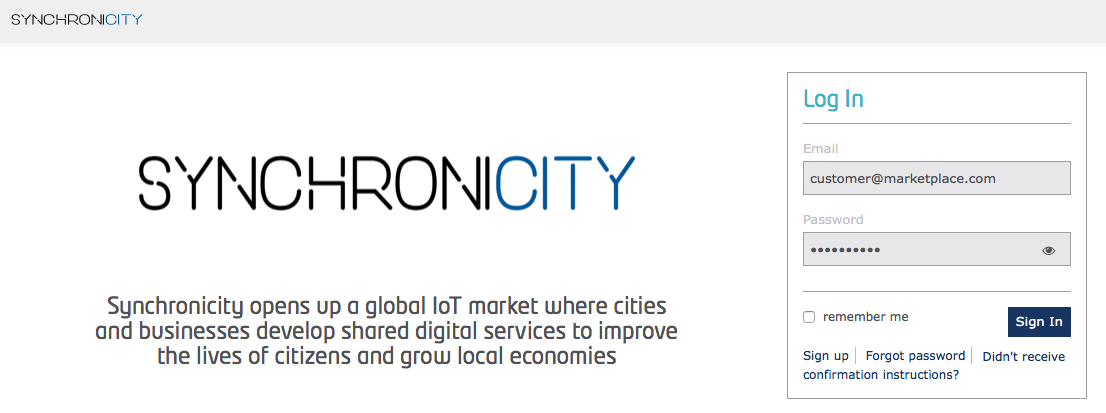
- Open a browser and enter to the SynchroniCity IoT Data Marketplace
- Click on the Sign In Button

- Provide your credentials in the IdM page
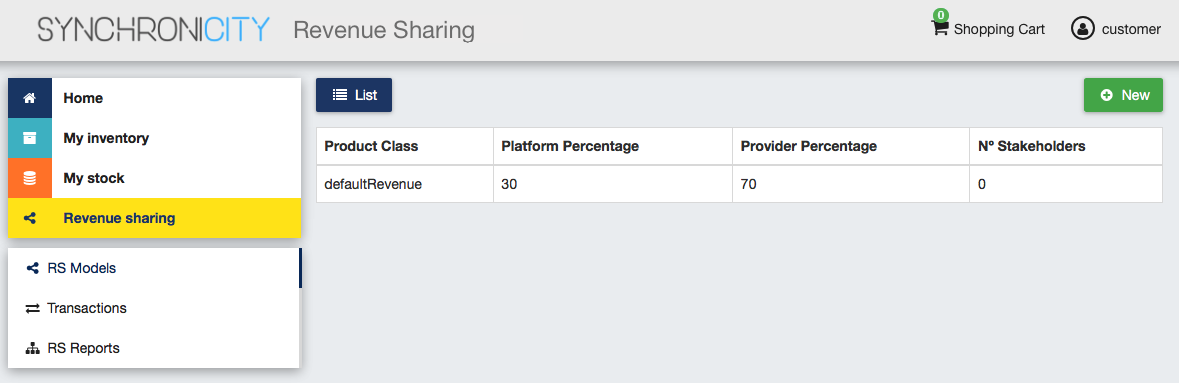
- Go to the Revenue Sharing section

- Ensure that the default RS Model has been created
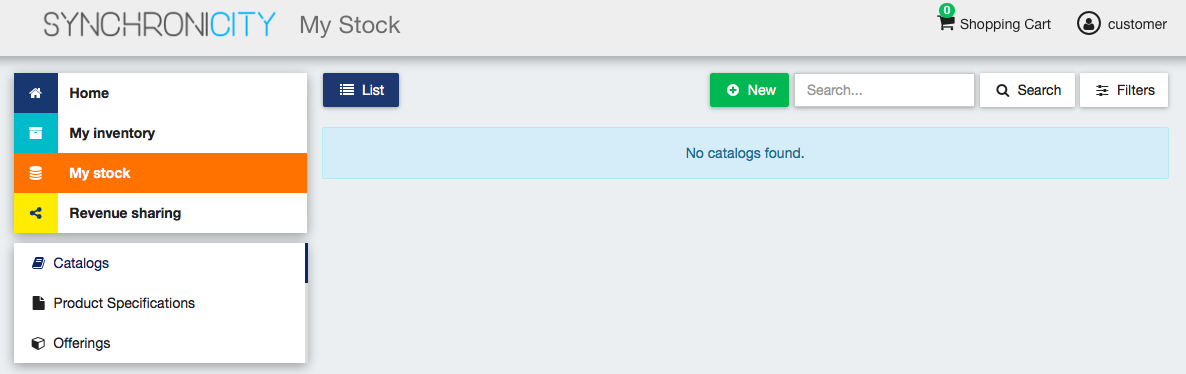
- Go to My Stock section and click on New for creating a new catalog
- Provide a name and a description and click on Next. Then click on Create

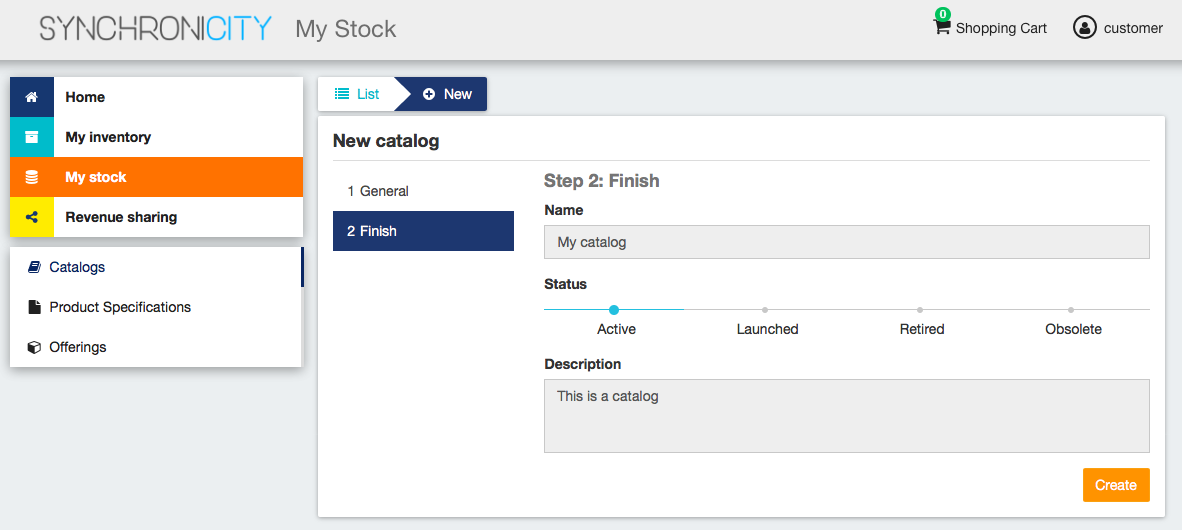

- Click on Launched, and then click on Update
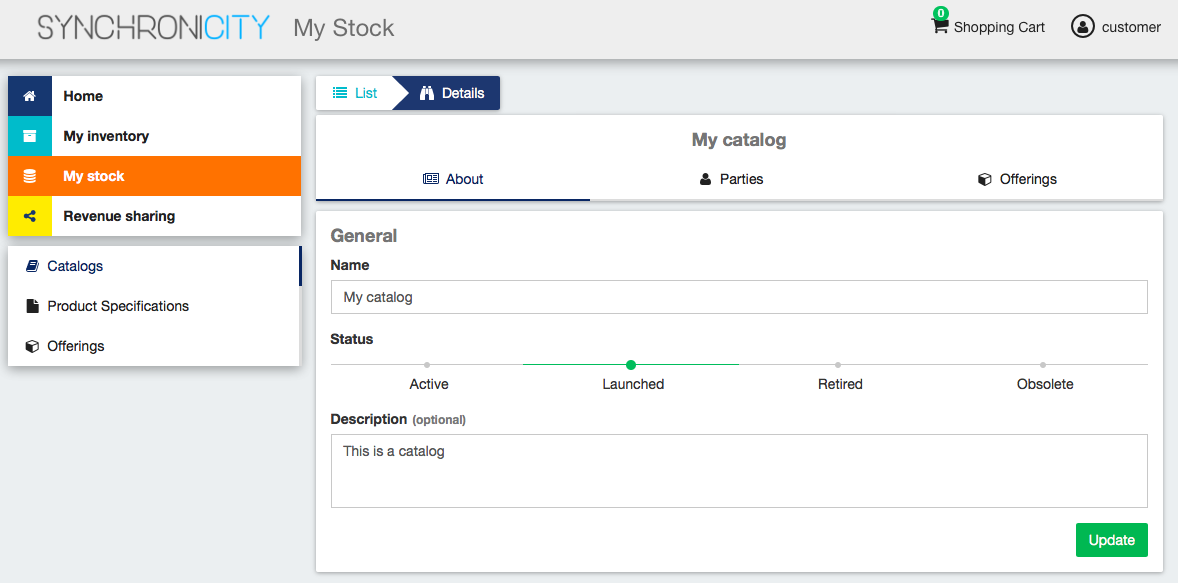
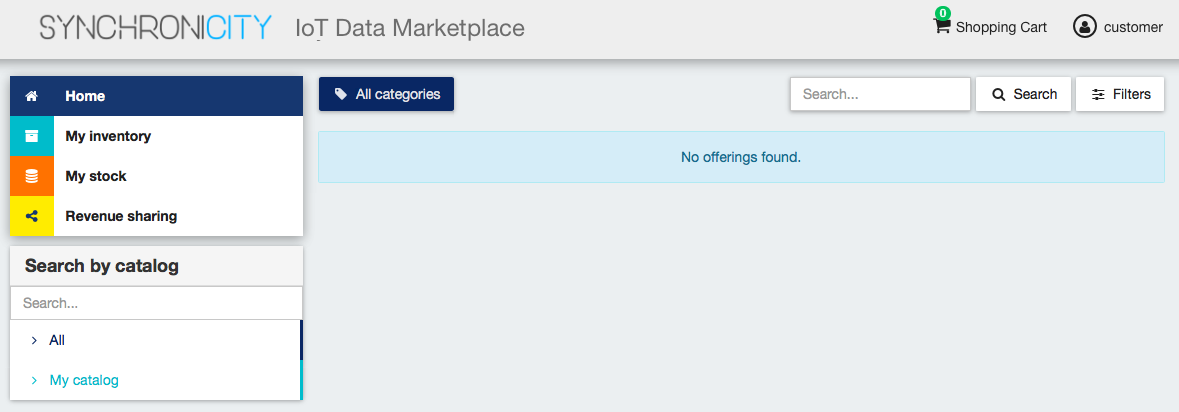
- Go to Home, and ensure the new catalog appears
List of Running Processes
We need to check that Java for the Glassfish server (APIs and RSS), python (Charging Backend) and Node (Proxy) are running, as well as MongoDB and MySQL databases. If we execute the following command:
ps -ewF | grep 'java\|mongodb\|mysql\|python\|node' | grep -v grep
It should show something similar to the following:
mongodb   1014     1  0 3458593 49996 0 sep08 ?        00:22:30 /usr/bin/mongod --config /etc/mongodb.conf
mysql     1055     1  0 598728 64884  2 sep08 ?        00:02:21 /usr/sbin/mysqld
francis+ 15932 27745  0 65187 39668   0 14:53 pts/24   00:00:08 python ./manage.py runserver 0.0.0.0:8006
francis+ 15939 15932  1 83472 38968   0 14:53 pts/24   00:00:21 /home/user/business-ecosystem-charging-backend/src/virtenv/bin/python ./manage.py runserver 0.0.0.0:8006
francis+ 16036 15949  0 330473 163556 0 14:54 pts/25   00:00:08 node server.js
root      1572     1  0 1142607 1314076 3 sep08 ?      00:37:40 /usr/lib/jvm/java-8-oracle/bin/java -cp /opt/biz-ecosystem/glassfish ...
Network interfaces Up & Open
To check the ports in use and listening, execute the command:
$ sudo netstat -nltp
The expected results must be something similar to the following:
Active Internet connections (only servers)
Proto Recv-Q Send-Q Local Address           Foreign Address         State       PID/Program name
tcp        0      0 127.0.0.1:8006          0.0.0.0:*               LISTEN      15939/python
tcp        0      0 127.0.0.1:27017         0.0.0.0:*               LISTEN      1014/mongod
tcp        0      0 127.0.0.1:28017         0.0.0.0:*               LISTEN      1014/mongod
tcp        0      0 127.0.0.1:3306          0.0.0.0:*               LISTEN      1055/mysqld
tcp6       0      0 :::80                   :::*                    LISTEN      16036/node
tcp6       0      0 :::8686                 :::*                    LISTEN      1572/java
tcp6       0      0 :::4848                 :::*                    LISTEN      1572/java
tcp6       0      0 :::8080                 :::*                    LISTEN      1572/java
tcp6       0      0 :::8181                 :::*                    LISTEN      1572/java
Databases
The last step in the sanity check, once we have identified the processes and ports, is to check that MySQL and MongoDB databases are up and accepting queries. We can check that MySQL is working, with the following command:
$ mysql -u <user> -p<password>
You should see something similar to:
Welcome to the MySQL monitor.  Commands end with ; or \g.
Your MySQL connection id is 174
Server version: 5.5.47-0ubuntu0.14.04.1 (Ubuntu)

Copyright (c) 2000, 2015, Oracle and/or its affiliates. All rights reserved.

Oracle is a registered trademark of Oracle Corporation and/or its
affiliates. Other names may be trademarks of their respective
owners.

Type 'help;' or '\h' for help. Type '\c' to clear the current input statement.

mysql>
For MongoDB, execute the following command:
$ mongo <database> -u <user> -p <password>
You should see something similar to:
MongoDB shell version: 2.4.9
connecting to: <database>
>
Diagnosis Procedures
The Diagnosis Procedures are the first steps that a System Administrator will take to locate the source of an error in a GE. Once the nature of the error is identified with these tests, the system admin will very often have to resort to more concrete and specific testing to pinpoint the exact point of error and a possible solution. Such specific testing is out of the scope of this section.
Resource Availability
Memory use depends on the number of concurrent users as well as the free memory available and the hard disk. The SynchroniCity IoT Data Marketplace requires a minimum of 1024 MB of available RAM memory, but 2048 MB of free memory are recomended. Moreover, the SynchroniCity IoT Data Marketplace requires at least 15 GB of hard disk space.
Remote Service Access
N/A
Resource Consumption
Resource consumption strongly depends on the load, especially on the number of concurrent users logged in.
- Glassfish main memory consumption should be between 500 MB and 2048 MB
- MongoDB main memory consumption should be between 30 MB and 500 MB
- Pyhton main memory consumption should be between 30 MB and 200 MB
- Node main memory consumption should be between 30 MB and 200 MB
- MySQL main memory consumption should be between 30 MB and 500 MB
I/O Flows
The only expected I/O flow is of type HTTP, on port defined in the Logic Proxy configuration file